Tuesday, September 11, 2012

Chimichurri


Chimichurri is an Argentinian sauce for grilled meats, but it works well with anything grilled. Great also as a pregrill marinade, it is a combination of fresh herbs, usually parsley and cilantro, plus garlic, onion, olive oil and vinegar. It is grassy, herbaceous, and tangy.
There is no one correct way to make chimichurri. I used flat leaf parsley, cilantro, and since I had it outside I also used fresh marjoram, for its floral and lemony accent. You could use fresh oregano. I know some use sage or rosemary. I use a combination of red wine vinegar and fresh lemon juice, along with a little red onion, garlic, and jalapeno. This is a sauce that you can customize to your taste.
The herbs are chopped together but instead of chopping them on a cutting board and leaving some of their flavor behind on the cutting board, I pulse everything together in a food processor and add the oil and acids by hand. A simple seasoning with salt and pepper and you’re ready. Fire up the grill!

Chimichurri
1 cup flat leaf parsley
1 cup cilantro
3 to 4 Tablespoons fresh marjoram leaves
1 or 2 cloves garlic, lightly chopped
¼ cup red onion, chopped
1 jalapeno, seeded and chopped.
Juice of ½ lemon
1 Tablespoon red wine vinegar
¾ cup extra virgin olive oil
salt and ground black pepper, to taste

1. Combine the herbs, garlic, red onion and jalapeno in the bowl of a food processor and pulse until chopped. Remove the herb mixture to a bowl. Add the lemon juice, vinegar, olive oil, salt and pepper and whisk to combine. Cover and set aside until needed.


Grilled New York Strip Steak with Chimichurri
                         

"This is just to say" : A Plum Tart for the Poet's Daughter


We were short one person on our recent pie night. Our friend was away on his silent retreat, which his wife informed us might have been silent but far from austere. She came alone (unless you count the copy of Mother Angelica’s biography she smuggled into the house, much to the glee of our youngest daughter) and we had a plum tart, remembering William Carlos Williams’s poem. An appropriate dessert for the daughter of a poet, I thought.
The almond butter filling is based on a recipe from Spago Desserts, by Mary Bergin and Judy Gethers. The filling works for just about any fruit, especially stone fruits (cherries, apricots, plums, nectarines) and even non-stoners, like blueberries. (“Dude!”) Make the filling, spread it into a blind baked tart shell, top with the fruit and bake.
If you can’t find almond flour (or if it’s too pricey), grind 4 ounces of slivered almonds with the sugar in a food processor until the almonds are as finely ground as you can make them and proceed with the recipe.

Plum Tart with Brown Butter and Almond Filling      
For one 9” tart
You will need one recipe pate sablee, which is available on a prior post.

1 quart plums (you will need about 8 plums or so, depending on their size)
1 cup almond flour (4 ounces)
¾ cup confectioner’s sugar
¼ teaspoon salt
2 eggs
½ teaspoon vanilla extract                                                   
¼ pound (one stick) unsalted butter

1. Roll out the pate sablee dough and fit it into a 9” tart pan, trimming off excess dough at the edge of the pan. Lightly prick the bottom and sides of the crust with a fork. Refrigerate or freeze the tart shell for at least 20 minutes before baking.

2. Heat oven to 350 degrees. Remove the tart pan from the refrigerator or freezer. Place the pan on a baking pan. Fit the tart shell with a piece of aluminum foil and fill the foil with pie weights (dry beans and/or rice work just as well and they can be reused). Place the baking pan with the tart shell into the oven and bake for 10 minutes. Remove the pan from the oven. Carefully remove the aluminum foil and the pie weights; return the tart shell to the oven for an additional 5 to 7 minutes of baking. Remove the partially baked tart shell from the oven and set it aside to cool.

3. While the tart shell is cooling, prepare the fruit. Cut the plums lengthwise, exposing the pit. Remove the pits, discard them, and set the halved plums aside. Prepare the tart filling.  Begin by browning the butter. Cut the butter into pieces. Place the butter into a sauté pan and place the pan over medium heat. As the butter melts, a fine filigree of foam will rise to the surface and then disappear. Stir occasionally as the butter continues cooking. A foam of small white bubbles will appear on the surface of the melted butter. This is about the time the butter will begin to brown. Stir and watch; when the butter turns a nutty brown color, remove it from the heat and let it cool.

4. Place the almond flour, sugar, and salt into a medium-sized mixing bowl and stir together. Add the eggs and vanilla and stir to combine. Add the brown butter and stir until the butter is incorporated into the mix. Spread the filling into the tart shell. Arrange the plum halves, cut side up around the tart shell, pressing them gently into the filling. When the tart is filled, return the tart to the oven and bake for 45 minutes, until the filling has set and has turned a golden brown. Remove from oven and let cool. Dust the tart lightly with confectioner’s sugar and serve.


             This is just to say we have eaten the plum tart. Sorry about the paraphrase, WCW.

Monday, September 3, 2012

Roasted Peach and Arugula Salad with Blue Cheese and Crispy Prosciutto


"Do I dare to eat a peach?"

Let us go then, you and I, into the kitchen and roast some peaches for a salad. I liberally paraphrase St. Louis’s most famous poet (and Marx Brothers fan) but where else can you go for a recipe and literary allusions?
So why bother to roast a perfectly ripe peach? The brief roasting lightly caramelizes the surface of the peach and dries it slightly so the arugula doesn’t get too wet.

You can skip the prosciutto if you avoid things such things, but if you don’t, a domestic prosciutto from the deli counter will do the job; no need for the expensive imported kind.  Try to avoid the packages of sliced prosciutto because you’ll end up paying almost twice as much as you would if you got a quarter pound sliced at the deli counter. If you have prosciutto on hand, you’ll end up using a little to accent pasta dishes, and other recipes.

For the blue cheese, I chose Valdeon, a Spanish blue. We are unapologetic blue cheese junkies around here. Gorgonzola is our usual choice, but I wanted to change it up a little so I chose Valdeon. Use what you like, just don’t buy it crumbled.

This recipe is scaled to two servings but can easily be increased depending on how many you plan to serve. The vinaigrette makes more that two servings so keep it in the refrigerator for other salads. It slightly strays from the usual 3 parts oil for every one part vinegar ratio.

Roasted Peach and Arugula Salad with Blue Cheese and Crispy Prosciutto
One ripe peach
2 slices prosciutto
Two handfuls of baby arugula (about 1 ½ to 2 ounces)
3 to 4 Tablespoons blue cheese

1. Heat oven to 425 degrees. Half the peach lengthwise; pit and peel the peach. Slice the peach halves lengthwise in thirds or quarters, depending on the size of the peach. Place the peach slices into a small bowl. Mix the peaches with a tablespoon olive oil and a teaspoon of sugar. Place the peach slices in a single layer on a baking sheet lined with a silicon mat or piece of parchment paper. Roast the peaches in the oven for 15 minutes. Remove from oven and let cool.

                                                   
2. While the peaches are roasting, slice the prosciutto crosswise into thin strips. Place a small non-stick sauté pan over medium heat. Drizzle a tablespoon of olive oil into the pan; add the prosciutto pieces and cook until crispy, about 4 to 5 minutes. Remove the prosciutto from the pan and drain it on paper towels. Set aside.

3. To assemble the salad, place the arugula into a bowl. Add the roasted peaches, crisped prosciutto. and crumble the blue cheese over top. Spoon about 3 tablespoons of the sherry vinaigrette and mix to combine. If the salad appears too dry, add a little additional vinaigrette. Divide the salad between two plates and serve.


Sherry vinaigrette:
3 Tablespoons sherry vinegar
1 Tablespoon shallot, finely minced
1 teaspoon Dijon mustard
1 teaspoon salt
½ teaspoon freshly ground black pepper
6 Tablespoons extra virgin olive oil
2 Tablespoons canola oil

1. Place the sherry vinegar into a small bowl with the shallots and let stand for 3 to 4 minutes to allow the shallots to flavor the vinegar.
2. Add the Dijon mustard, salt and pepper and whisk together. Add the oils while whisking to create a smooth emulsion. Leftover vinaigrette can be stored in a container in the refrigerator.
(Alternately, you can mix this vinaigrette in a small jar, shaking to combine the ingredients).


Peach and Blueberry Pie


Aren’t you reaching now?  You made a peach pie and now it’s peach and blueberry?
Well, that’s precisely the point. Find what’s available at the market and use it before it’s gone.
Peaches are still abundant and they were sitting next to some blueberries. It’s a no brainer.
The slight twist is a crumb topping with yellow cornmeal and chopped almonds. You will need pie dough for a 9” pie.


Peach and Blueberry Pie with Cornmeal-Almond Crumb Topping

4 cups sliced peaches (about 1 ½ quarts)
1 pint blueberries
½ cup sugar
3 Tablespoons corn starch

1. Pit and peel the peaches. Slice the peaches into a bowl. Rinse the blueberries and let drain. Pick over the berries for any stems and remove them. Add the berries to the bowl with the peaches. Add the sugar and carefully stir together trying not to crush any berries. Set the fruit aside for 30 minutes.

2. Roll out the pie dough and fit it to the pan; trim excess dough and crimp the edge. Refrigerate the crust until needed.

3. To make the crumb mixture, place the flour, cornmeal, almonds, sugars, cinnamon and salt into the bowl of a stand mixer fitted with the paddle attachment. Mix to combine the dry ingredients. Cut the butter into pieces, add it to the bowl and mix until crumbs form. Set crumb mixture aside. (This can also be made by cutting the butter into the dry ingredients with a fork or pastry blender).

4. Heat oven to 450 degrees. Remove the pie crust from the refrigerator. Add the cornstarch to the bowl of fruit and mix until combined. Pour the fruit and the accumulated juices into the pie pan. Spread the filling evenly into the pan. Top the pie with the crumb mixture. Place the pie onto a baking pan; place the pie into the oven and bake for 10 minutes. Reduce the oven temperature to 350 degrees and continue baking the pie for 45 to 55 minutes, until the filling is bubbling. Remove the pie from the oven and let cool before serving.


Cornmeal- Almond Crumb Topping
¾ cup all purpose flour
¼ cup yellow cornmeal
¼ cup slivered almonds, chopped
¼ cup sugar
¼ cup light brown sugar
½ teaspoon salt
¼ teaspoon ground cinnamon
½ stick (2 ounces) unsalted butter, at room temperature

Wednesday, August 29, 2012

Bread + Tomatoes = Panzanella


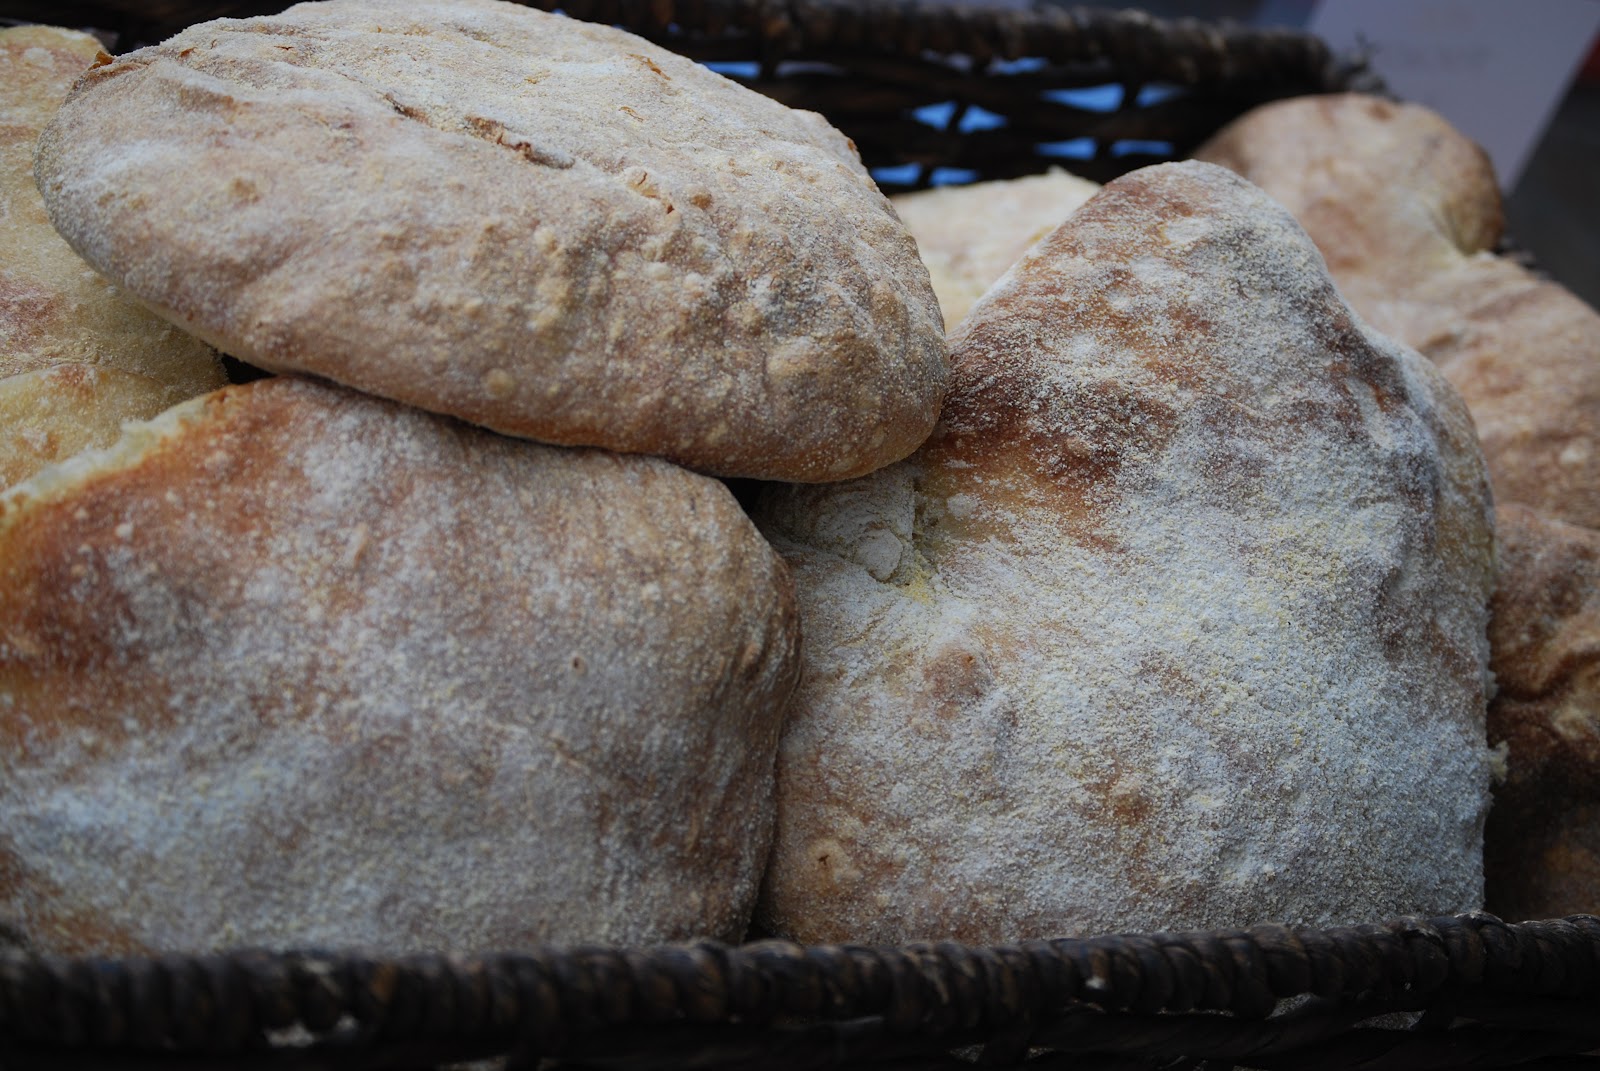
A good bakery is a welcome addition to any community; a great one is a gift. That is what Alice Bakery in downtown North Wales has become since opening its doors a year and a half ago. Everything is made from scratch every morning. If you are going to indulge in your daily carbs, this is the way to do it.
Owner Dennis Darr, who named his bakery after his grandmother (it’s pronounced “a-lease”), graduated from the French Pastry School in Chicago. When looking around at schools, the French Culinary Academy in New York City told him that Chicago's French Pastry School was ranked number one in the nation. After a trip to see the school, there was no need for further decisions.
The business has grown steadily. Dennis and his crew make and sell breakfast pastries, desserts, custom cakes, handmade chocolates (when the weather cooperates) and of course, bread. They also serve  lunch.

Thinking of Alice's breads gets me thinking of panzanella, the Italian bread and tomato salad.  Tomatoes are abundant right now, especially at farmers markets and local roadside stands. Use heirlooms, small cherry tomatoes, whatever is best. Cut some leftover bread (like the kind at Alice) into cubes, mix it with the tomatoes and a vinaigrette and you have panzanella. I should point out that our youngest daughter doesn't like raw tomatoes, only cooked ones, but she will eat around the tomatoes in order to get to the the bread which has absorbed the tomato juices and vinaigrette. Yes, we're a little wonky around here.

Panzanella
This makes enough for two. It can easily be increased (more tomatoes, more bread, etc) to serve a larger crowd.

1 cup day old bread, cut into 1/2" cubes              
2 cups tomatoes, diced 
¼ red onion, sliced
8 to 10 oil cured olives, pitted
1 teaspoon capers
¼ cup torn fresh basil leaves
2 Tablespoons balsamic vinegar
6 Tablespoons extra virgin olive oil
salt and ground black pepper

1. In a medium-sized mixing bowl, whisk together the olive oil and balsamic vinegar. Add the tomatoes, onion, olives, and capers to the bowl: season with salt and ground black pepper. Let the tomatoes sit and marinate. About 2 minutes before serving, add the bread cubes and the basil. Mix together and allow the bread to soften by soaking up the vinaigrette. Divide into two portions and serve, avoiding the tomatoes, if you are so inclined.


                                                  http://www.alicebakery.com/


Red Quinoa Salad with Grilled Corn and Peaches


                                    “Blow up your T.V., throw away your paper,
                                          Go to the country, build you a home.
                                     Plant a little garden, eat a lot of peaches….”*


This is a simple salad, one which can be eaten by itself or as an accompaniment to a meal. It can, of course, be made with the regular (non-red) variety of quinoa, too. You can augment it with additional vegetables, such as peeled and diced cucumber, cherry tomatoes, etc. Because my cooking in the summer tends to be rather “basil-centric,” I opted to use mint, but you could just as easily use fresh basil; peaches and basil work well together.
You could also “grill” the corn directly over the flame of a gas stove or simply slice the corn off the cob and simmer it in lightly salted water for about 3 minutes, then drain and refresh it under cold water.


Red Quinoa Salad with Grilled Corn and Peaches
For 4 to 6 servings

¾ cup red (or plain) quinoa
1½ cups water
¼ teaspoon salt
2 ears of corn, grilled
2 ripe peaches, peeled and diced (a little over 1 cup)
½ cup red onion, diced
2 Tablespoons chopped fresh mint
2 Tablespoons olive oil
1 Tablespoon balsamic vinegar
salt and ground black pepper, to taste

1. Place the water into a medium-sized saucepan and season with salt. Place the pan over high heat and bring the water to a boil. Add the quinoa and stir. Cover the pot and lower the heat to a gentle simmer. Cook for 15 minutes or until all of the water is absorbed. The quinoa will be tender and the germ ring, which will look like a small thread, will be visible. Drain the quinoa in a fine strainer, refresh under cold water and let cool.

2. Cut the grilled corn off of the cobs into a medium-sized mixing bowl. (If you skipped the grilling and simmered the corn off the cob, add it to a mixing bowl). Add the diced peaches and onion to the bowl and mix together. Add the cooled quinoa and the mint and mix to combine. Add the olive oil and balsamic vinegar and mix to dress the salad; season with salt and ground black pepper. Refrigerate the salad, covered, until needed. Taste for seasoning before serving.

*from Spanish Pipedream, by John Prine

Sunday, August 12, 2012

Preserved Lemons

"I'm so tired, tired of waiting, tired of waiting for you.." *


Preserved lemons are a finishing condiment unique to Moroccan cooking. Strictly speaking, they are a type of pickle, since they are being "transformed" into something else while soaking in a brine. They just take longer than your standard refrigerator pickle.
While preserved lemons may not be noticed if omitted in a recipe, once you use them, you’ll want to have them on hand. They have become an ingredient that have been adopted by chefs and used in different ways. Making preserved lemons is easy; this is really a set of instructions. This is the way I learned from a Moroccan chef/friend. Each Moroccan may have her or his own personal twist to the preparation. All you need are lemons, kosher salt, and lemon juice (the bottled kind found in the grocery store works well for this preparation) plus a couple of clean jars, depending on how many you are planning to make. My friend uses pickling spice as a flavoring to make his; it’s not essential. It just adds another dimension to the finished product. Some use cinnamon sticks. Except for the process, there is no “correct” recipe.

Preserved Lemons:
Lemons
Kosher Salt
Bottled lemon juice
Picking Spice (optional)
To prepare preserved lemons, wash the jars thoroughly. Wash the lemons and dry them. Slice the lemons in half, lengthwise, but leave them attached at the bottom. Cut the lemons again into quarters, leaving them attached at the bottom.
Over a bowl, generously pour salt over all the cut surfaces. Place the salted lemons into the jar; if they don’t fit whole, you can halve them. Fill the jar with as many lemons as will fit. If you are using the pickling spice, spoon a tablespoon of it into the jar. Pour lemon juice into the bowl to dissolve the excess salt and pour this over the lemons in the jar, along with enough lemon juice to fill the jar. Cap the jar, turn it upside down a few times and place the date on the lid. Leave the lemons at room temperature for a day or two, and then refrigerate them. Then wait. The process of preserving takes about two months, but then you’ll have your first supply of preserved lemons.
I know that someone said that the waiting is the hardest part but once they have been made, your hard work is all done.
I’ll get back to you with some recipes, but you’ll have to wait.


*Tired of Waiting,  lyrics by Ray Davies
(How many more song cliches can I pull out for this one?)