Sunday, May 27, 2012

Strawberry Preserves


                                 “God save strawberry jam and all the different varieties”*


Strawberry Preserves


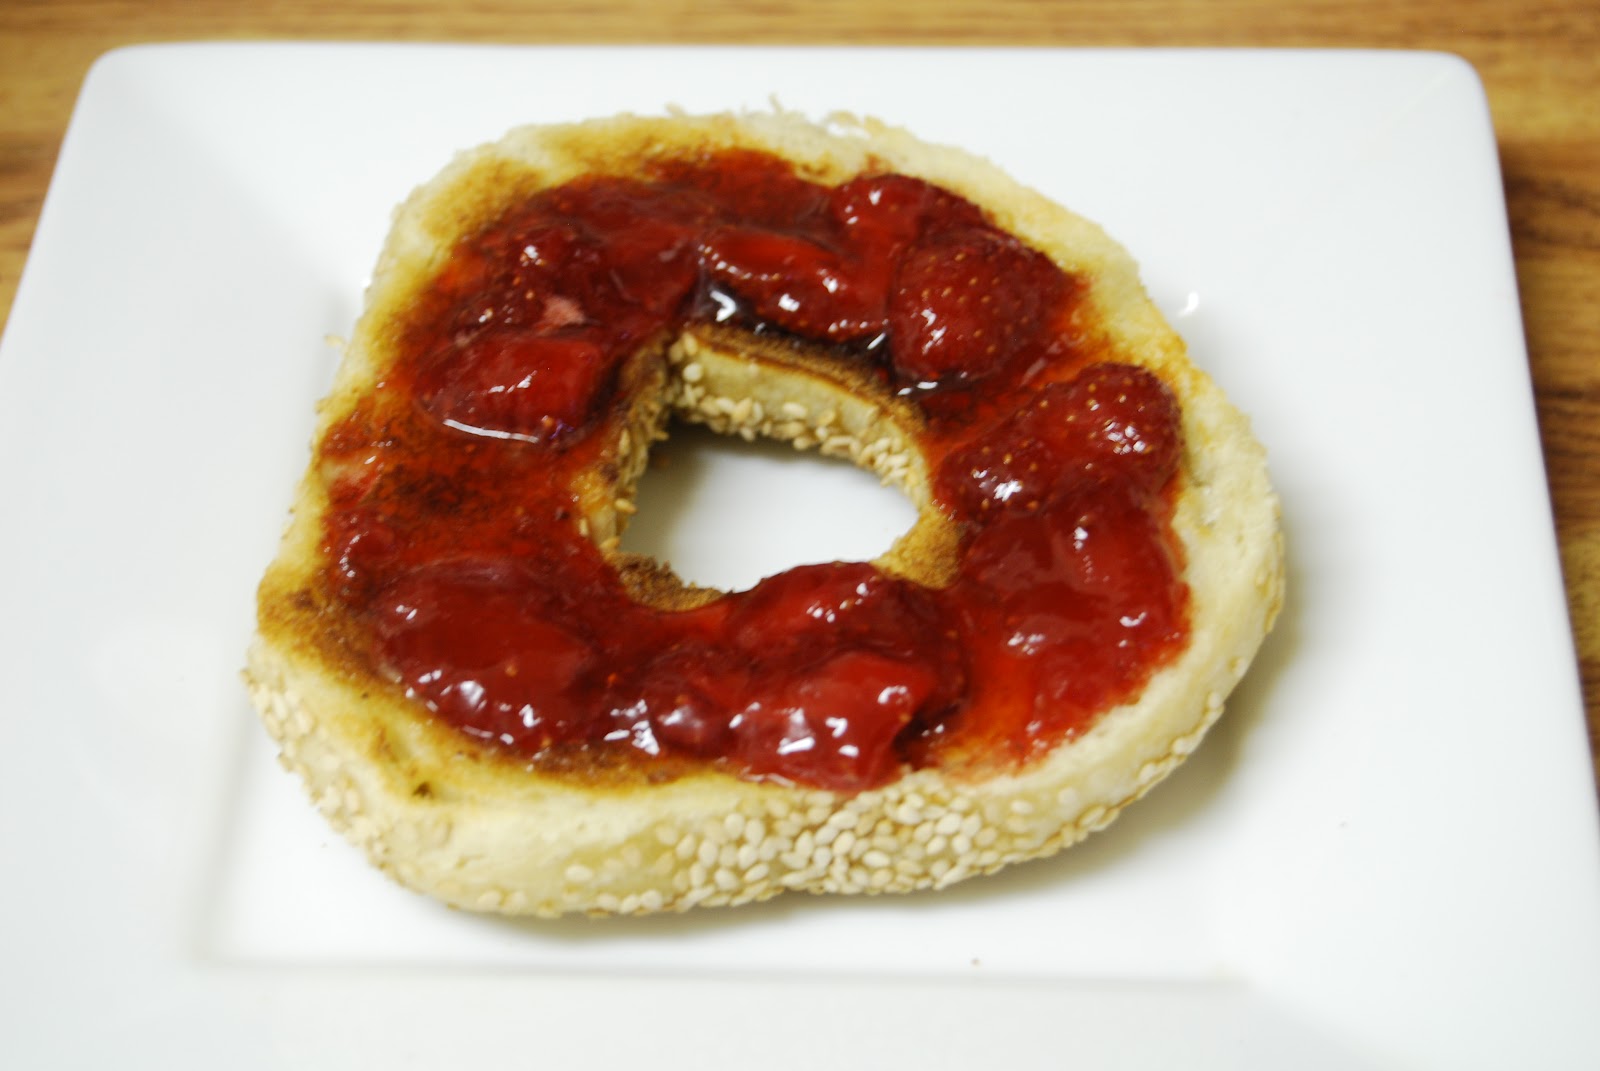
At home, our fresh strawberry preserves on a sesame bagel from Spread Bagelry**


There was an article in a the food section of the Los Angeles Times written by the great Russ Parsons about making small batch seasonal preserves. The idea was to use whatever fruit was currently available at  local farmer’s markets.  By small batch, it meant one or two jars and it used no added pectin as you might normally use when making jam. You don’t have to can them.  Just store them in the refrigerator.
The instructions are dead simple: Take a quantity of fresh fruit and an equal weight of sugar. Put the fruit and sugar into a saucepan. Stir it together and bring it to a boil. Turn off the heat and let it sit for at least 6 hours.  Then ladle small batches of the cooked fruit into a non-stick sauté pan and cook it for until it thickens. Pour the finished preserves into a clean jar. Repeat until all of the fruit has been cooked and your jars are full. Cover the jars and refrigerate.
And it does work that easily.
The jam making process became a game with Parsons and his friends: Just exactly how much could they reduce the sugar and still get a nicely thickened jam?
My first batch was made with a quart of strawberries. The cleaned berries weighed 1¼ pounds. I decided to use a little less sugar, 1 pound (or 2 cups).  Since I couldn’t leave the jam out for 6 hours, I refrigerated it and began the next step the following day. I cooked it again in small amounts. Within 3 to 4 minutes, it began thickening. I spooned the finished preserves into a  plastic container until it was full and stored it in the refrigerator. They did set up quite well, perhaps not as thick as when you use pectin, but the results were delicious. I liked having the flexibility to use less sugar, making a preserve that wasn’t overwhelmed by a lot of added sugar.
I went through the season making raspberry, blackberry, blueberry, and peach preserves, joining in the game by slightly reducing the sugar to weight ratio with each fruit. Even though we used the finished preserves almost every day, they lasted into the winter.
Now with the return of local strawberries, it’s time to begin again.

Strawberry Preserves

One quart of strawberries yielded 17 ounces of fruit. The usual ratio is equal weights fruit and sugar, but having made preserves this way before, I reduced the sugar to 1½ cups (12 ounces). This amount will fill a three cup container. You can increase the recipe to make additional jars of preserves.

1 quart strawberries
1 ½  ounces sugar

1. Wash the strawberries and drain them. Remove the stems and trim away any unripe bits. Slice the berries in half or quarters, depending on their size. If you like a smoother jam, puree the berries in a blender or food processor.  Put the strawberries into a saucepan; add the sugar and stir. Place the pan over low heat and bring it to a full boil, stirring the mixture as it heats. Remove the pan from the heat, cover, and wait at least 6 hours. Alternately, let the fruit mixture cool and refrigerate it until the next day.

2. Ladle about one-quarter of the preserves into small non-stick sauté pan. Place the pan over high heat and cook the preserves until they thicken, stirring throughout with a wooden spoon. (This takes about 2 to 3 minutes. A good test if the preserves have thickened is to drag the bottom of the wooden spoon through the jam. If a clean line appears momentarily through the bubbling mixture, it’s done.

3. Carefully pour the preserves into the jar. Repeat until all of the jam mixture has been cooked. Let the preserves cool, then cover and refrigerate. Yield: 3 cups preserves.

As the season progresses, I’ll give my recipes for the other different varieties I make.

* from “ The Village Green Preservation Society,” by Ray Davies


**What do you get when two friends, fed up with the quality of bagels, travel to Montreal to learn how they make bagels up there? You get Spread Bagelry - Montreal-style wood oven bagels located just west of Rittenhouse Square at  262 S. 20th Street, Philadelphia.
                                                         http://www.spreadbagelry.com/


Strawberry Rhubarb Pie

   
Strawberry Rhubarb Pie
(Listening: Anat Fort Trio- And If )

When I mentioned to a friend that fresh rhubarb was available and I was going to make a tart, he replied, “Call me when you make strawberry/rhubarb.”
Here’s your call. Actually we e-mailed. As much as we’d like to, we can’t eat this entire pie by ourselves.

Strawberry-Rhubarb Pie
This makes one 9“ pie. You can make this with a top crust or with a crisp/crumb topping. The recipe for that is available in the rhubarb tart posting. A recipe for pie crust follows, if you need one. You could forgo the crust and bake this in a dish covered with crumb topping, too.

1 Quart strawberries
12 ounces rhubarb stems, about 3 cups
½ cup sugar
5 Tablespoons cornstarch

1. Rinse the strawberries under cold water. Remove the stems and cut the berries in half or quarters, depending on their size. Place the cut berries into a bowl. Rinse the rhubarb and wipe dry with a paper towel. Slice the rhubarb crosswise into ½ “ pieces. Place the rhubarb into the bowl. Add the sugar and mix together; cover the bowl with plastic wrap and let stand for 30 to 45 minutes, so that some of the juices can be released. (At his time, roll the crust and fit it into the pie pan. Refrigerate until needed).

2. Heat oven to 450 degrees. Mix the cornstarch with the berries until dissolved. Pour the strawberries and rhubarb, plus the juices into the pie shell. Top the pie with either a second piece of dough or crumb topping. If you made a double crust pie, cut a steam hole into the top of the pie. Place the pie onto a baking sheet (strawberries are juicy when the bake). Bake for 10 minutes, then reduce oven temperature to 350 degrees and continue baking the pie for one hour / one hour & fifteen minutes, until the filling is bubbling. Remove the pie from the oven and let cool.


I think I hear our friends arriving. Time to start the coffee.


Pie Crust:
For one crust; double the recipe for a double crust pie.

1 ½  cups all purpose flour
½ cup shortening
¼ teaspoon salt
6 Tablespoons cold water

1. Place the flour and salt into a bowl. Using a fork or  pastry cutter, cut half of the shortening into the flour until it makes small crumbs; cut the remaining shortening into the flour, leaving it in larger sized pieces. Add the water and mix until a ball of dough comes together. Remove the dough from the bowl. Pat it flat, wrap it in plastic and refrigerate for at least an hour.


                                                    http://www.anatfort.com/

Monday, May 21, 2012

Wild Things: Fiddlehead Ferms and Morel Mushrooms


“Wild Thing!”
And Max said, “I’ll eat you up!” *

Salmon with Fiddleheads Ferns and Morels


Hold on a minute, Max. Those wild things are mine. And please, don’t send me off to bed without eating anything. 
This past weekend at the farmer’s market one of the merchants, Mainly Mushrooms, had fiddlehead ferns and morels, two wild treats of the spring. The morels weren’t local; it was a bad spring for morels around here, so they were from elsewhere; sometimes you can’t eat locally all the time. The fiddleheads and wild mushrooms became part of a dinner to celebrate spring. We purchased four ounces each of the fiddleheads and morels but saved some of each for a later use (perhaps tossed with some pasta and asparagus on another day?). If you want to splurge, and morels are a splurge, you could use more. Who am I to tell you what to do?
Although the recipe calls for salmon (I used some wild sockeye, previously frozen but still delicious) you could use chicken, which is what I did for our youngest daughter (who isn’t very fish friendly). If you don’t want to bother with the butter sauce, you could use the pan juices from the morels and fiddleheads.
A note for the inexperienced: morels cannot be eaten raw; they are toxic until cooked.

Salmon with Fiddleheads and Morels with White Wine Butter Sauce
For two portions

Two 5 to 6 ounce portions salmon fillet
2 ounces fiddlehead ferns
2 ounces morel mushrooms
salt and ground black pepper
olive oil and  unsalted butter, for cooking

1. Rinse the ferns under cold water. Trim off the bottom ends. For a contrasting look, gently push the center of a few of the ferns so they uncoil. Set the fiddleheads aside. Rinse the morels under cold water to remove any dirt. Slice the morels in half or quarters, depending on their size. Set aside.
2. Heat a small sauté pan over medium heat; when hot, swirl in a tablespoon olive oil. Add the fiddlehead ferns; season lightly with salt and black pepper and cook for 3 to 4 minutes. Remove from heat and set aside.
3. Heat a second small sauté pan over medium heat; when hot, add a teaspoon each olive oil and butter to the pan. Add the morels, season lightly with salt and black pepper and sauté for 3 to 4 minutes. Set aside.
4. If making the white wine butter sauce, prepare it now, set it aside and keep warm.
5. Heat a non-stick sauté pan over high heat. Season the salmon with salt and pepper. When the pan is hot, swirl in a tablespoon of olive oil. Add the salmon, skin side up, to the pan. Sear the salmon for 3 to 4 minutes (depending on the thickness). Turn the fillets and cook for an additional 3 to 4 minutes, to the desired degree of doneness. Remove the salmon from the pan to a plate. Reheat the fiddleheads and morels.
6. To serve, plate the salmon fillets onto two plates. Spoon the sauce over and around the salmon. Garnish with the fiddlehead ferns and morels.


White Wine Butter Sauce

1 teaspoon minced shallot
½ cup dry white wine
2 to 3 Tablespoons cold unsalted butter

1. Place the shallots and wine into a small saucepan. Place over medium-high heat and simmer until the wine is reduced to 2 or 3 tablespoons. Over low heat, whisk in the butter until a creamy emulsified sauce forms; season lightly with salt. Set aside and keep warm until needed; if the sauce gets too hot, the butter will break.


* words by the great Maurice Sendak, from “Where the Wild Things Are.” You will be missed, Mr. Sendak. Your books have made a lasting impression on us and in our children’s lives. We are ever grateful. Thank you. 


Welcome Back- The Opening of the Farmer's Market


Spring moves slowly here in the Mid-Atlantic, but this past weekend our local farmer’s market opened. While it is still early for many of the vendors, it was a time to greet the merchants like they were old friends.


There were great baked goods from Dennis Darr’s Alice Bakery, along with those from Tabora Farms, who will be a welcome addition to the downtown when their store opens.


Jett's Produce had early spring greens--lettuces and Swiss chard--that were grown in their hot houses, bringing promises of the days ahead.


There were plants available to purchase and plant at home. A few craft vendors, such as Wayne Stratz and Margaret Almon's Nutmeg Designs, were spread between the stalls.


Mainly Mushrooms returned for their second year with foraged ramps and fiddlehead ferns, plus wild treats like morels and porcini mushrooms.


As the weeks progress, the farmers will have more offerings, piled high and beckoning us to cook. Until then, we must wait.

Strawberries, Take Two


Strawberries, Take Two: Easy Frozen Strawberry Yogurt

I’m not ready to pull out the ice cream maker just yet but by using a food processor, there is an easy way to put together a frozen treat with seasonal fruit. With strawberries in season, I used a quart of fruit, yogurt, local honey, and a little vanilla extract to put this “frozen yogurt” together. Plus, it can be pretty guilt free if you use fat-free yogurt. I improvised this but it was easy to correct the recipe following the evening’s tasting session. I had cautiously used too little honey, but that was easily was remedied by bringing the jar of honey to the table and letting everyone drizzle a little extra honey over their portion. Finishing her honey-laced dessert, our oldest daughter leaned back in her chair and said, “I think I could be Winnie the Pooh.”

Easy Strawberry Frozen Yogurt
I used Greek yogurt, which is tarter than regular yogurt, so depending on what type of yogurt you use, the amount of honey you need will differ. Taste and add additional honey to your taste.

1 quart strawberries
2 cups plain yogurt (or one 17.5 ounce container plain Greek yogurt)
¼ cup to 6 Tablespoons honey
2 teaspoons vanilla extract

1. Rinse the strawberries and pat them dry with paper towels. Remove the stems—cut them out; don’t slice off the top of the strawberry. Cut the strawberries in half or quarters, depending on their size. Line a baking pan with a sheet of parchment paper or a silicon mat. Lay the cut strawberries onto the tray and freeze the berries until solid.


2. Remove the strawberries from the freezer. Place the strawberries, yogurt, honey and vanilla into the bowl of a food processor. Pulse/process the mixture until smooth. The frozen strawberries will chill the mixture to the texture of frozen yogurt. Empty the contents of the food processor bowl into a dish; cover with plastic wrap and freeze for 20 to 30 minutes. Scoop and serve.


Thursday, May 17, 2012

You Must Believe in Spring- Strawberries: It's Time for Strawberry Shortcake


Strawberry Shortcake
(Listening: Zelenka: Trio Sonata No.5 in F Major   Heinz Holliger, et all)


Our first locally grown strawberries arrive here around Mother’s Day, weather permitting. It is a time I wait for.  Strawberries are the real first fruit of the season: yes, I know that rhubarb appears first, but that is the stem of a plant that we use like a fruit, not a true “fruit”.
Nothing showcases strawberries better than strawberry shortcake.  Sliced strawberries tossed with a little sugar so their juices run, spooned on top of a freshly baked shortcake. Add some whipped cream, sour cream, crème fraiche, yogurt, or, nothing at all and you’re there.
Shortcake is nothing more than a lightly sweetened biscuit. (No, it is not that yellow spongy thing you find in the store next to the strawberry display). Southern cooks have access to all types of biscuit flours which was a real surprise to a Yankee like me. But we can get as good of a result if we mimic the best biscuit flour mixes.
I use a combination of all purpose and plain cake flours. The cake flour lightens the texture of the biscuit. I only use baking powder. I’ve found even a little baking soda effects the taste of the biscuit. If you can’t get buttermilk, the old World War 2 trick of souring regular milk with a touch of white vinegar will do the trick. You can use either shortening or butter, but remember, just as when you use butter in a pie crust, the biscuits won’t be as delicate as with shortening. When I learned to make biscuits, the common knowledge at the time was to never over handle the dough, but I discovered something that my mother didn’t know. If you pat the finished dough, then fold it over upon itself, then repeat this two or three times, you create an effect somewhat similar to making puff pastry.

Strawberry Shortcake:
For six servings
1 quart strawberries
3 to 4 Tablespoons sugar

1 cup all purpose flour
1 cup plain cake flour
2 teaspoons baking powder
½  teaspoon salt
2  Tablespoon sugar
¼ cup shortening
1 cup buttermilk or 1 milk mixed with 1 teaspoon white vinegar

1. Wash the strawberries and drain them. Slice the strawberries in quarters or half, depending on their size. Place them into a bowl; add the sugar and mix to distribute the sugar. Cover and refrigerate for at least an hour; more time won’t hurt.

2. Heat oven to 450 degrees. Sift all of the dry ingredients into a medium-sized mixing bowl. Add the shortening and “cut” it into the flour mixture using a fork or pastry blender. Add the milk and mix until a dough forms. Remove the dough from the bowl. On a lightly floured surface, pat the dough gently. Fold the dough  over on to itself. Repeat patting and folding two or three additional times. Let the dough rest for a minute or two before patting it out to your desired thickness. Using a round cutter, about 2 ½” wide, cut the shortcakes (you can cut them to whatever size you choose). Gather any scraps, gently press them together and reuse to make additional shortcakes.

3. Place the shortcakes onto a lightly greased cookie sheet or baking pan. Lightly brush the tops of the shortcakes with milk and sprinkle the shortcakes with some sugar. Bake for 7 minutes, then rotate the cookie sheet and bake for an additional 6 to 7 minutes until golden brown. Remove from oven and let cool.

4. To serve, cut the shortcakes in half. Top the bottom of the each shortcake with some strawberries and the juices. Add whipped cream, etc., if using. Arrange the top of the shortcake over the strawberries and serve. Spring is here.


Local strawberry sources: R & J Farm Market
Longview Center for Agriculture


excerpt of Trio Sonata No. 5 in F Major
Jan Dismas Zelenka
ECM New Series1671/72


Wednesday, May 9, 2012

Spring is here: Asparagus


Asparagus Risotto
(Listening: Jacob Young: Sideways)

Our youngest daughter is still in college and dorm life doesn’t lend itself to creative cooking, either on your own or in the dining halls. So whenever she’s home, we cook together. When the first sounds reach her from the kitchen, I know she’ll appear and ask to help. (Her older sister would say it’s because of second child syndrome; she’s bored, that’s all, and looking for a distraction).

Risotto is something we’ve made together for a long time. At first, I could leave her to it while I hovered in the background and did other things, eyeing her (and the risotto’s) progress. She no longer needs me to hover. She makes great risotto.

Asparagus risotto is an early rite of spring. When it’s too early for local asparagus, California asparagus will do the job. Out local season is near; asparagus from Delaware has recently appeared at a local farm market.
You can use chicken broth or vegetable broth. You can make an easy vegetable broth with the lower parts of the asparagus stems that you break off when you trim the asparagus (just don’t use the very, woody bottom ½” or so) along with half a medium onion, a carrot or two and one or two stalks of celery, all cut into 1” pieces. Place the vegetables into a medium-sized saucepan; fill pan with cold water. Lightly salt the water (1/4 teaspoon salt, enough to bring out the flavors of the vegetables but not so much that you end up with salty broth). Bring the pan to a simmer and reduce by a third. Taste the broth; cook longer if necessary. Strain the finished broth, pressing the vegetables with a spoon to release more juices and reserve to use for the risotto.

Risotto is always finished with butter. For this recipe, I make an asparagus butter; if you don’t want to, you can skip it.

Asparagus Butter (optional)
¾ cup chopped asparagus
2/3 cup water
3 Tablespoons unsalted butter, melted

1. Place the asparagus and the water in a small saucepan over medium heat. Lightly salt the water. Simmer the asparagus until tender. Remove from heat. There should be water leftover in the pan. If  needed, add 2 to 3 tablespoons water. Puree with an immersion blender until smooth. Whisk in the butter. Season to taste with salt and ground black pepper. Transfer the asparagus butter to a small bowl and set aside until needed. Leftover asparagus butter can be frozen and used at another time.


Asparagus Risotto
For the purpose of this recipe, this has been scaled to two portions. For larger portions, figure 1/3 cup Arborio rice and 2 to 3 ounces asparagus per serving, along with additional broth.
Even though I have made risotto for a long time, I still set a timer (for 18 minutes after the wine is added) and cook the risotto while eyeing the timer

2/3 cup Arborio rice
3 cups chicken or vegetable broth
2 Tablespoons minced shallot
½ cup dry white wine
¼ pound asparagus, cut into ½” pieces (about 1 cup)
2 Tablespoons asparagus butter, or unsalted butter
2 to 3 Tablespoons grated Parmesan cheese
olive oil, for cooking
salt and freshly ground black pepper


1. Place the broth into a saucepan over medium heat and bring it to a simmer. Keep it at a low simmer as you cook the risotto.
2. Place a second saucepan for the risotto over medium heat. When hot, swirl in 2 Tablespoons olive oil. Add the shallots and sweat for 2 to 3 minutes; adjust heat if necessary. Add the rice and stir to coat it in the olive oil.
Pour in the white wine and stir. Stir until the wine is almost absorbed. Ladle about ¼ cup of the hot broth into the rice. Now begins the process of stirring the rice and adding the broth, about ¼ cup at a time. Adjust the heat to keep the risotto at a gentle simmer. Add broth when the liquid is almost absorbed into the rice; stir throughout at this point of the cooking.
3. After about 5 minutes, add the asparagus pieces. With the asparagus pieces in the risotto, you may have to add a larger amount of stock to cover the rice and asparagus. Season the risotto with a little salt.
4. Continue cooking the risotto by adding more broth as needed. After about 10 minutes cooking time, you won’t need to stir constantly but watch that there is enough broth in the pot and the risotto isn’t sticking to the bottom of the pot.
5. After about 18 minutes, taste the risotto. The rice should be firm but it shouldn’t have any undercooked crunch to it. If it does, continue cooking for a few more minutes.
6. When the risotto is al dente, remove risotto from heat. Stir in 2 to 3 Tablespoons asparagus butter (or plain unsalted butter). Add the Parmesan cheese and freshly ground black pepper and stir. Cover the pot and set it aside for two minutes. After two minutes, check the risotto. Add a little extra broth if you like your risotto a little loose.
Portion the risotto into two bowls. Drizzle each with a little extra virgin olive oil and additional grated Parmesan. Serve and sigh. Yes, my kid made this.


Friday, May 4, 2012

Spring can really hang you up the most: Rhubarb


Rhubarb at Longview Center for Agriculture
Worcester, Pa


Rhubarb 
(listening to: Gerald Clayton: "Bond")

Marcel Proust had his madeleine, but for me the smell of cut rhubarb takes me back to childhood. My mother would keep a bowl of stewed rhubarb in the refrigerator where it was ready to eat, chilled. I still make stewed rhubarb for a quick dessert. Cook two cups sliced rhubarb with about 3 tablespoons sugar and 1/2 cup water or orange juice until it softens and begins to fall apart. Taste and add additional sugar, if necessary. I like the tartness of the rhubarb balanced with just enough sugar to get the sensations of both sweet and tart. Serve it warm with vanilla ice cream or Greek yogurt. You could even crumble a shortbread cookie over the warm rhubarb.
Only the stems of the rhubarb plant are eaten. The leaves contain high levels of oxalic acid, but opinions differ as to whether that alone contributes to their toxicity.
For further reading:  http://helios.hampshire.edu/~nlNS/mompdfs/oxalicacid.pdf

You can make either a 10" tart or a 9" pie with this recipe. If you want to ditch the crust altogether, you can spread the filling into a baking dish along with the crumb topping and make a rhubarb crisp. Just reduce the cornstarch to 4 tablespoons for the crisp. I use cornstarch, not flour, to thicken fruit pies.

Rhubarb Crumb Tart
1 recipe pate sablee (recipe below)
crumb topping (recipe below)

6 cups sliced rhubarb (about 1 & 1/2 pounds rhubarb stems)
1/2 cup sugar (either white or light brown)
the zest and juice of one orange (you could substitute 3 Tablespoons water)
5 Tablespoons cornstarch

1. Place the sliced rhubarb into a bowl. Add the sugar, zest, and juice and mix to combine. Set the bowl aside for 20 minutes to allow the sugar to extract some of the rhubarb juices.
2. Roll out the pate sablee and fir it into a 10" tart pan. Trim off the overhang with your thumb; scraps can be saved and re-rolled for small cookies. Lightly prick the bottom and sides of the crust with a fork. Refrigerate or freeze the tart shell for 20 to 30 minutes.
3. Heat oven to 350 degrees. Line the tart shell with a piece of aluminum foil. Fill the foil with rice and/or dried beans, or pie weights (the rice/beans can be save and reused). Place the tart pan onto a baking pan and bake for 15 minutes. After 15 minutes, remove the pan from the oven. Remove the foil with the rice/beans and return the tart pan to the oven and bake for an additional 5 minutes. Remove the pan from the oven and set aside to cool.
4. Mix the rhubarb with the cornstarch until dissolved. Spoon the rhubarb into the tart shell. Spread the crumb mixture evenly over the rhubarb. Place the tart into the oven and bake for 50 to 60 minutes, until the fruit is bubbling. Remove from oven and let cool. A 10" tart will serve 8 to 10; a 9" pie will serve 8.


Pate Sablee 
I learned to make this at my first pastry job. It was in the middle of the summer and the dough kept breaking and falling apart. I thought my days were numbered, but apparently not. This dough can be a little tricky to use at first but it is very forgiving. Unlike other pie crust doughs, mistakes can be easily repaired and patched. Unlike traditional pie crust dough, pate sablee can be gathered back together and rerolled.
This is essentially a cookie dough which means you could mix it by hand with a spoon, the same way you would mix a batch of cookies.
Pate sablee needs to warm up before you use it. Remove it from the refrigerator for about 10 minutes. Cut it into pieces. On a floured surface, knead the pieces together until the dough is smooth. Roll the dough out to the size needed, with a thickness of about 1/8". Fit the crust into the tart pan, pressing the dough in place. Press off any dough that is overhanging the edge with your thumb. Lightly prick the sides and bottom of the tart with a fork; refrigerate or freeze the shell for 10 minutes before baking. The tart shell can also be assembled in advance and kept in the refrigerator or freezer until needed. Blind bake the shell as directed.

For one tart shell:
¼ pound (1 stick) unsalted butter, at room temperature
½ cup confectioner’s sugar
1 egg yolk (Grade A Large)
1 1/3 cups (plain) cake flour
½  teaspoon salt
½  teaspoon baking powder

1. In the bowl of a stand mixer, whip the butter with the paddle attachment until smooth. Add the confectioners sugar and slowly mix the sugar into the butter. When the sugar is completely blended, add the egg yolk and mix until smooth.
2. Sift together the flour, salt, and baking powder. Slowly add the flour mixture into the butter until incorporated and smooth. If the dough feels a little tacky to your fingers, add an extra tablespoon or two of flour. Remove dough from the mixer. Knead it together into a ball, if necessary. Wrap the dough in plastic wrap and refrigerate for at least 4 to 6 hours before using. Makes enough dough for one pie shell, up to 11” in diameter.


Crumb Topping  (you could add oats or nuts to this, too)
1 cup all-purpose flour
1/4 sugar
1/4 cup light or dark brown sugar
1/2 teaspoon salt
3/4 teaspoon ground cinnamon
4 ounces (1 stick) unsalted butter, cut into small pieces

1. Place the dry ingredients into the bowl of a stand mixer and using the paddle attachment, lightly mix together.
Add the butter and mix until small crumbs form. Set aside until needed. (Alternately, this can be mixed together by hand, cutting the butter into the flour/sugar mixture with a fork or pastry blender.)