Wednesday, November 20, 2013

Cherry & Cranberry Tart with Almond Crumble


(Listening: John Abercrombie Quartet: 39 Steps)*

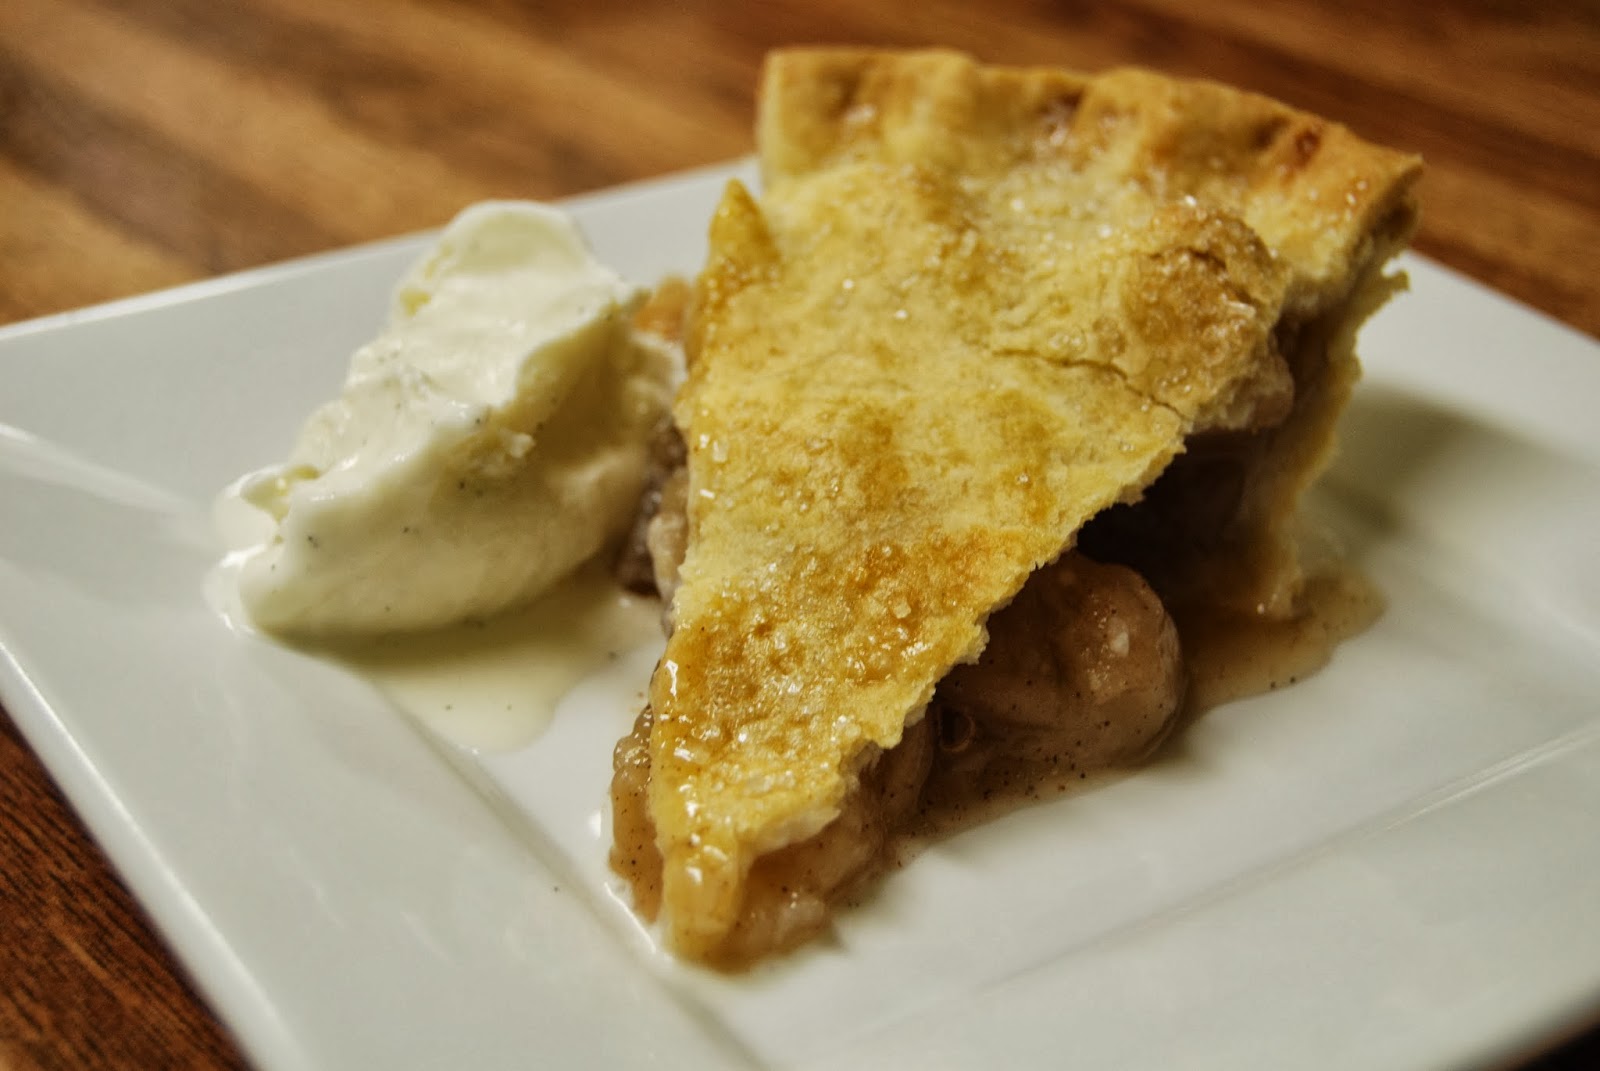
Every pie or tart begins with the crust which for many can be intimidating, what with all of the warnings that go with making the crust—"Don’t overwork the dough, don’t add too much water, make sure you use enough water, roll the dough in one direction...."
Relax!
For tarts, I use pate sablee, which is essentially a cookie-style dough which is hard to mess up. It can be re-rolled and patched more easily than traditional pie dough. Unfortunately, you can only use it for tarts.
Pate brisee, which is what the French call our traditional-style crust  dough does take a little practice. I have found that if you make a double batch (a two crust recipe), the water necessary (3/4 cup) works out more easily than the tablespoon approach for one crust. Divide the dough and freeze what you don’t use. (Crust dough recipes and tips can be found in previous posts).
And this leads to the shortening vs. butter argument. I always use shortening. It makes for a flakier crust. Truthfully, the flakiest crusts are made with lard, the mention of which sends people running for cover. But lard is lower in saturated fat than butter so for occasional use, especially when flakiness is sought, lard could be your shortening of choice. (One of my nephews used to laugh uncontrollably at the mention of the word "lard." Kids!).
You could also use a combination of butter and shortening.
Then there’s the argument about the trans fats in vegetable shortening.
But I didn’t come here for an argument. I came to make this week’s pie/tart.
In the summer, when sour cherries were available at the farmer’s market I froze some and suggested you could do the same and said I would return with a recipe. It’s that time.
This is a recipe suitable for the upcoming Thanksgiving holiday. Not quite traditional but it does include that seasonal staple, cranberries.

The filling is cooked separately then spooned into the crust. Cherries give off a lot of juice and by thickening the fruit before you bake the tart assures that your filling shouldn’t run when the tart is cut.

Remember what I learned years ago: Even if you make a mistake, there will always be plenty of people to eat what you have made.

Cherry and Cranberry Tart with Almond Crumb
You will need one recipe pate sablee for a 10” tart. This can also be made as a 9” pie.

6 ounces cranberries (almost 2 cups)
½ cup sugar
½ cup water
2 cups (pitted) sour cherries
1/3 cup sugar
2 Tablespoons cornstarch
¼ cup water
1. Remove the pate sablee from the refrigerator and let soften. Knead the dough lightly on a lightly floured surface until smooth. Roll the dough out to an  1/8th inch thickness. Fit the dough into a 10” tart
pan, trimming the excess dough from the edge of the tart pan. Using a fork, lightly prick the bottom and sides of the dough. Refrigerate the tart shell for 15 to 20 minutes.
2. Heat the oven to 350 degrees. When the tart dough has chilled, remove it from the refrigerator. Place the tart pan onto a baking pan. Line the tart shell with a piece of aluminum foil and fill it with dried beans/rice/or pie weights. Place the pan into the oven and bake for 15 minutes; after 15 minutes remove the pan from the oven. Carefully remove the foil with the pie weights. Return the empty tart pan to the oven and bake for a final 5 minutes. Remove from the oven and let cool.
3. While the tart shell is baking, prepare the filling. Rinse and pick over the cranberries; discard any that may be soft or bruised. Place the cherries into a bowl, add the sugar and stir.
4. Place the cranberries, sugar, and water into a large sauté pan. Place the pan over medium heat and cook the cranberries until they pop, stirring as they cook. When the cranberries have cooked (about 4 to 5 minutes) add the cherries and their juice. In a small bowl, mix together the cornstarch and the water. When the fruit begins to boil, stir in the cornstarch mixture and cook the fruit until it comes to a boil and thickens. Remove from the heat and let cool.
5. Prepare the almond crumble topping:

Almond Crumble
4 ounces (1 cup) slivered almonds
1 cup all purpose flour
¼ cup sugar
¼ cup brown sugar
1 teaspoon salt
4 ounces (1 stick) unsalted butter, at room temperature, cut into pieces

To prepare the crumble topping, place the almonds into a food processor and pulse them until finely ground. (You could also use already ground almonds).
Remove the ground almonds from the food processor and place them into a bowl of a stand mixer. Add the flour, sugars, and salt to the almonds and using the paddle attachment, mix to combine. Add the butter into the flour mixture and mix until small crumbs form. (This can also be done by hand using a fork or a pastry cutter). Set completed almond crumble mixture aside.

Assembling the tart

Keeping the tart shell on the baking tray, spoon the completed filling into the tart shell with a slotted
spoon: you may not need all of the fruit juices. Cover the top of the tart with the crumble mixture; there may be about ¼ cup of the crumb mixture leftover.
Place the tart into a 350 degree oven and bake for 25 to 28 minutes, until the topping is golden brown. Remove tart from the oven and let cool before serving. Wait for the pie night revellers to arrive then slice and serve.

Could this be the start of a new holiday tradition?

And watch for pits! Sorry guys.


* The first Abercombie quartet, which also featured pianist Richie Beirach, recorded three albums between 1979 and 1981 and was one of my favorite groups at the time. The "piano quartet" has reformed with Marc Copland on piano (Since 2000, Beirach has been teaching at the Leipzig conservatory "Felix Mendelssohn-Bartholdy"). Here is a moment from a recent performance:
http://www.youtube.com/watch?v=ugVqMD_FQE4

Wednesday, November 6, 2013

Sour Cream Apple Tart with Walnut Crumble


Listening: Gretchen Parlato: Live in NYC*

If you are a reader of these dispatches sent out over the world wild web, you might know of our weekly pie night which gives us a chance to connect with friends and relax over pie.
My wife, the red-haired food co-pilot, recently took on a new position which has had her working crazy hours; we still reconnect over dinner, whatever time that might be, but we’ve had to skip a few pie nights. This week she had an obligation so pie night went on the road. She needed “something” for a reception, so as the ace up her sleeve I settled on this.
Much of the prep- the pate sablee, the assembly of the tart shell, the walnut crumble, even the precooking of the apples can be done in advance leaving only the final assembly and baking.
I used some Macoun apples I picked up at the last day of one of our farmers markets and mixed them with some Fuji apples. Use whichever apple you like.

Sour Cream Apple Tart with Walnut Crumble
You will need one recipe of pate sablee for a 10” tart

For one 10" tart:      
1 ¾ pounds apples, peeled and cut into ½” slices
2 Tablespoons sugar
1 cup (fresh) apple cider
1 cup sour cream
1 teaspoon sugar
1 teaspoon vanilla extract
2  Grade A large Eggs


1. Place the apple slices into a bowl, add the sugar and mix; set aside.
2. Place a sauté pan large enough to hold the apple slices onto the stove. Pour the apple cider into the
pan, turn the heat to medium-high and bring the cider to a simmer. When the cider is hot, add the apple slices to the pan. Poach the apples until they are just tender; the point of a knife should just pierce the flesh of the apple. Remove the pan from the heat, drain the apples and set them aside to cool.
3. While the apples are cooling, roll out the pate sablee to 1/8th inch thickness and fit it into a 10” tart pan. Using a fork, lightly prick the bottom of the tart. Refrigerate or freeze the tart until ready to bake.
4. Heat oven to 350 degrees. Remove the tart shell from the refrigerator or freezer. Fit a piece of aluminum foil into the pan to cover the dough. Fill the foil with dry beans, rice or pie weights. Place the tart pan onto a baking tray and bake the tart shell for 15 minutes; after 15 minutes remove the tart from the oven; remove the foil with the beans/rice/pie weights and return the tart shell to the oven to bake for another 5 minutes. Remove the partially baked tart shell from the oven; set aside and let cool.
5. In a medium-sized mixing bowl, place the sour cream, sugar, vanilla, and eggs. Whisk together until smooth; set aside. Layer the apples into the tart pan. Pour the sour cream custard over the apples; use a spatula to spread the custard over the apples. Lightly sprinkle the crumble mixture over the top of the tart. Place the tart into the oven and bake for 30 minutes, until the custard is set. Remove tart from oven. When the tart is cool, send it off with your wife. Wait for her to return with your reward of some leftover Nanaimo bars. That’s fair enough.


Walnut Crumble
This recipe makes more crumble than you will need. It’s really a light sprinkle of crumb over the sour cream not meant to cover the tart entirely. You can freeze the leftover crumb mixture and use it for another tart.
1 cup all-purpose flour
¼ cup brown sugar
¼ cup granulated sugar
1 cup chopped walnuts
1 teaspoon salt
½ teaspoon ground cinnamon
6 Tablespoons unsalted butter, at room temperature, cut into pieces

1. Place all of the dry ingredients into the bowl of a stand mixer and using the paddle attachment, mix them together. Add the butter and mix until small crumbs form. (This can also be done by hand). Remove and use. Leftover can be stored in a sealable plastic bag.


* Last fall my wife and I along with two friends were lucky to catch Gretchen Parlato at the Philadelphia Museum of Art. At that time, she was touring so extensively I wondered when she would find time to record her next album. It turned out that a live recording was planned for the upcoming weeks, now released and titled “Live in NYC.” 

                                                     http://www.gretchenparlato.com/

Friday, October 25, 2013

Sous le Pommiers: Apple Pie with Cinnamon. Cider, and Maple


Everyone has his or her favorite apple. My wife, the red-haired food co-pilot, is partial to Granny Smith for their tartness. The young woman behind the cash register at the farmer’s market said she was “obsessed with Honey Crisp apples.” At another market a customer was waiting for her Jonathan apple fix.
I am more of an applications guy: What am I going to make?
It’s time for our weekly pie night. Autumn brings to mind certain tastes-cinnamon, freshly pressed apple ciders, and maple syrup (although made in the spring). I revisited my apple pie recipe and introduced these flavors; nothing astonishing, but you don’t need to reinvent the wheel all the time.
I used Cortland apples from a local farm market. Feel free to use your favorite apple.
You could leave off the top crust and cover the pie with a crisp-crumble topping. 
But don’t forget the vanilla ice cream.

Apple Pie with Cinnamon, Cider, and Maple
For one 9” pie
You will need pie dough for a double crust pie, or a single crust pie with crumb topping

2 ½ pounds apples, peeled, cored, and sliced into ½” thick slices
2/3 cup sugar
½ teaspoon ground cinnamon
¼ cup maple syrup (accept no substitutes!)
1/3 cup apple cider
3 Tablespoons cornstarch
1 egg beaten with 1 teaspoon water


1. Place the sliced apples into a bowl.  Add the sugar, cinnamon, maple syrup and cider; mix to
distribute evenly. Set bowl aside for at least 20 minutes.
2. Roll the pie dough to an 1/8th inch thickness and fit it into the pie pan. Refrigerate until needed.
2. Heat oven to 450 degrees. After the apples have sat for 20 minutes, add the cornstarch and mix until the cornstarch is dissolved.
3. If you haven’t rolled out the top crust, roll it out. Spread the apples evenly into the prepared bottom crust; pour the juices over the apples. Wet the edge of the bottom crust with the egg wash. Place the top crust over the apples, pressing to seal it to the edge of the bottom crust; trim away any excess dough. Seal and crimp the edges of the pie (or cover the pie with your favorite crumble mixture). Make a small steam hole in the center of the top crust. Brush the crust with egg wash and sprinkle sugar over the top.  Place the pie onto baking pan and place the pie into the oven. Bake for 10 minutes. After 10 minutes, reduce the heat to 350 degrees and continue baking for an hour, until the filling is bubbling (Listen!). You can also test to see if the apples are cooked by sliding a toothpick into the steam hole to see how easily it slides through the apples. Remove from oven and let cool.


Monday, October 14, 2013

Lobster Mushrooms


                        "And take a look you may see me on the ground
                                     For I am the parasite of this town.”*


Some parasites can be good. Take an undistinguished wild mushroom and let it play host to a parasitic fungus (Hypomyces lactiflourum, if you must know) and the result is a lobster mushroom, so called because its bright orange color resembles the shell of a cooked lobster.
Lobster mushrooms appear late summer and into the early autumn so I paired them with some corn, which will begin disappearing the deeper we get into autumn. This is a dish about a slow letting go now that summer has passed and autumn is here.
I paired them with gnocchi a la Parisienne, the French version of gnocchi made with pate a choux dough. You can pair it with regular gnocchi from the store or local Italian market or just pasta.
This recipe is a simple sauté, cooking the mushrooms and making a broth in the pan. Add the corn kernels and the cooked gnocchi, toss, taste, and serve.

Lobster Mushrooms and Corn with Gnocchi a la Parisienne
For 4 servings
¼  to ½ pound fresh lobster mushrooms (depending on how flush you are)
4 ears of corn, husked
1 Tablespoon minced shallot
1 Tablespoon chopped garlic
1 to 2 Tablespoons minced chives, for garnish
Olive oil
2 Tablespoons unsalted butter
¼ to ½ cup water, or more
salt and ground black pepper
one batch of the gnocchi a la parisienne

1. Clean the mushrooms of any dirt. Trim off the bottom of the mushrooms and discard. Slice the mushrooms into ¼”wide pieces and set aside.
2. Cut the corn kernels off the cob; stand the corn upright in a bowl and slice down the length of the cob. Discard the cobs.
3. Heat a large non-stick sauté pan over medium-high heat. Swirl in 2 to 3 tablespoons olive oil. Add the shallot and cook for two to three minutes. Add the mushrooms to the pan; add additional olive oil if the pan appears dry. Season the mushrooms with salt and pepper; add the garlic and cook until the garlic is fragrant. Add some water to the pan and reduce the heat. Cook the mushrooms for 3 to 4 minutes. A simple broth should be forming in the pan as the mushrooms cook. Add the corn, season with salt and pepper, and add additional water to the pan. Cook until the mushrooms are tender.
4.  Add the butter to the pan of vegetables. Add the cooked gnocchi to the pan and stir to combine. Test for seasonings and adjust. When the gnocchi are warmed through, divide between four bowls.  Garnish with a scattering of the additional minced chives and serve.


Gnocchi a la Parisienne
Unlike Italian gnocchi dough, which is made from potatoes, gnocchi a la parisienne is made from choux dough.
It is  piped from a piping bag, not rolled and cut like traditional gnocchi. Pate a choux is better known as the basis for cream puffs or éclairs. Here the sugar is omitted. The dough can be made ahead of time, kept in a lightly oiled bowl with plastic wrap pressed directly on the top.
All pate a choux recipes are basically the same with equal amounts liquid to flour. It is easier to make in an electric mixer but if you beat the eggs into the dough by hand it will be a fine workout.
Here are a few tips when using a pastry bag. After you fit the tip into the bag, twist the bag at the bottom and push it into the top of the tip. In this way the dough won’t escape before you’re ready.  To make the bag easier to fill, fit into a container with the top ends of the bag draped over the top edge of the container which will hold the bag open as you add the choux dough.
Don’t over fill the pastry bag. Twist to seal the bag and always press from the bottom of the bag.

1 cup water
1 teaspoon salt
3 Tablespoons unsalted butter
1 cup  all-purpose flour
3 Grade A large eggs
2 Tablespoons grated Parmesan cheese
1 Tablespoon minced chive
           
1. Place the water, salt, and unsalted butter into a medium-sized saucepan. Place the pan over high heat  Remove from heat and let cool. Place the dough mixture into the bowl of a stand mixer. Add the eggs one at a time until each egg is mixed into the dough. The dough should be smooth. Add the cheese and chives and mix until combined.
and bring the mixture to a boil. Add the flour and mix until the flour is incorporated. Stir over the heat; a film should form on the bottom and sides of the pan.
2. Fill a medium-sized saucepan halfway with water; lightly salt the water. Bring the water to a simmer. Fit the choux paste into a pastry bag fitted with a 5/8” –wide tube tip (I use a #807 tip).  Rest the tip of the bag onto the edge of the saucepan and use a small knife to cut 1” pieces of the dough as you press out the dough; don’t over crowd the pan. Gently poach the gnocchi until they rise to the top; allow the gnocchi to cook for 2 to 3 minutes. Remove the gnocchi with a slotted spoon and let them drain on a paper towel lined baking pan. The completed gnocchi can be placed onto a lightly oiled tray and frozen. When the gnocchi are frozen, they can be transferred to a sealable plastic bag and stored for future use.
Makes approximately 80+ one inch gnocchi, enough for 4 servings

*Nick Drake, “Parasite”

Tuesday, October 1, 2013

Ca va faire une maudite poutine!


I had never heard of poutine, the Quebecois dish of French fries, cheese curds, and gravy until our youngest daughter returned from a class trip to Quebec about six years ago. Since then it has become more familiar south of the 49th parallel, invading much in the same way as Tim Horton’s franchises.

Poutine originated in rural Quebec sometime in the late 1950’s with several communities claiming to be its birthplace. One story says that the first person asked to combine cheese curds with French fries replied, ”Ca va faire une maudite poutine.” (“It will make a damn mess.”). Whether or not this is true, it's a great description of what you get.
There are now endless variations using everything from ground beef to chicken, to Bolognese sauce or beef bourguignon, not to leave out Au Pied de Cochon’s artery-ripping foie gras poutine with foie gras gravy (“Hand me my Lipitor!”) or versions made with duck confit (yes, please!) and even lobster (Montreal chef Chuck Hughes bested the perpetually smug Bobby Flay with this dish on Iron Chef). Friends have had a vegetarian version from a food truck while in Rochester for the jazz festival.
In Montreal there are poutine restaurants open 24 hours, so it’s not hard to imagine that poutine could be something of a late-night food after a period of drinking, much like going for a bag of White Castle sliders.

Youngest daughter has wanted me to make poutine at home. Until recently, the only fresh cheese curds I could find were available on line from Wisconsin, but I had to order twenty pounds.
As I said, that was until recently.
I discovered that two of our local farm markets carry ½ pound containers of locally made cheddar cheese curds. While poutine purists might say that the curds should be the Frommage Beaucronne brand and they should be squeaky fresh. I wasn’t too worried about that detail in order to make poutine. If Mr.Sub, the Canadian chain of sandwich shops can make a “Philly cheese steak sub,” then I can make a poutine here.

You don’t have to follow our lead. I am sure many Canadians make poutine with frozen fries that they bake in the oven and use the St. Hubert brand of gravy in a pouch. Gravy in a pouch?
But not here, O, Canada!
The longest part of the recipe is making the fries. You’ll need Idaho or Russet baking potatoes. You can choose to peel them or not. Cut them lengthwise into ½ “ x ½ “ batons (you know, French fry shapes) and soak them in cold water. Before you fry the potatoes, dry them thoroughly with a clean kitchen towel or paper towels (youngest daughter is genius at this). If you don’t have a deep fat fryer, choose a deep pot.  You should also have a frying thermometer. You will need about 1½ “ of vegetable oil; not very deep but it works. You may need to fry the potatoes in batches but that presents no problem.
French Fries need to be fried twice, once to blanch the potatoes and cook them through then a second time at a higher temperature to brown and crisp them. Between both steps you need to drain them on a baking tray lined with paper towels. Salt the completed fries: you can keep them warm in the oven (325 degrees).

The gravy for poutine is based on the classic French veloute sauce, which is a roux mixed with stock. You can use beef or chicken stock; I used some chicken stock I had in the freezer. Season the gravy with ground black pepper and a touch of red wine vinegar.
What do you serve with poutine? Well, to lessen any guilt, we made a huge salad. It may not be traditional but after all, our poutine may not be la vraie poutine but it is une vraie putain.

Poutine
A recipe like this easily expands to feed more people even though we made it for the three of us
2 to 3 Russet or baking potatoes
8 ounce container of cheese curds

1. Wash and peel the potatoes. Cut the potatoes lengthwise into ½” thick batons  Store the cut potatoes in a bowl of cold water.
2. Remove the curds from the refrigerator on cut them into bite-sized pieces, if necessary. Set the curds aside until needed
3. Prepare the gravy:

Veloute gravy

3 Tablespoons unsalted butter
3 Tablespoons flour
2 cups chicken or beef stock
salt and ground black pepper
½ Tablespoon red wine vinegar

1. Place a saucepan over medium heat. Add the butter. After the butter has melted whisk in the flour. Continue cooking the roux for several minutes until brown; you may wish to lower the temperature beneath the pot during this process. When the roux is a nice medium-brown color, remove the pot from the heat. Carefully whisk the stock into the roux, return the pan to the heat and whisk until the veloute gravy comes to a boil and thickens; it will not be a thick gravy. Remove from the heat, season with salt, ground black pepper, and the vinegar. Set aside.
2. Prepare the fries: A word or two about frying in hot oil. Exercise caution and monitor the temperature of the oil. If the oil ever spikes above 375 degrees, reduce the heat and let the oil cool before proceeding.
Drain the potatoes and pat them dry.  Add about 1 ½"of vegetable oil (canola oil) to a pot. Place a thermometer into the pot and bring the oil to a temperature of 325 degrees. Blanch the potatoes for 5 to 6 minutes. Remove the potatoes and drain them on a tray lined with paper towels. Let the oil temperature recover to 325 before frying a new batch of potatoes. After all the fries have been blanched, raise the temperature of the oil to 375 degrees and fry the potatoes until golden brown and crisp. Salt the fries and keep them warm in the oven.
3. Assembling the poutine: Warm the gravy. Divide the fries between plates or bowls. Scatter the cheese curds, about 2 ounces per serving, over the fries and top with some gravy. Serve and enjoy your maudite poutine.


All of this has been made possible by the discovery of Honeybrook cheddar cheese curds, made by September Farm http://www.septemberfarmcheese.com/ which are  available locally at R&J Farm Market http://randjfarmmarket.com/index2.html
or Merrymead Farm. http://www.merrymead.com/


Congratulations to Jeremy Denk and Vijay Iyer, two pianists (one classical, one jazz) recently named MacArthur Fellows.
http://jeremydenk.net/
http://vijay-iyer.com/

Wednesday, September 18, 2013

Each peach, pear, plum: A farewell to Summer- Peach and Plum Pie


The handwritten sign said it all:  “Last plums of the season.” This week’s pie is a farewell to summer. One that I will only gradually let go.


Peach and Plum Pie
You will need pie dough for a 9” double crust pie.

1 quart ripe peaches, about 2 pounds/4 cups sliced
1 quart ripe plums, about 1 pound/generous 2 cups sliced
½ cup sugar
1 teaspoon vanilla extract
4 Tablespoons cornstarch
egg wash- 1 egg mixed with 1 Tablespoon water

1. Peel, pit and slice the peaches and place them into a bowl. Pit and slice the plums and place them into the bowl with the peaches. Add the sugar and stir. Set aside for 20 to 30 minutes.
2. On a lightly floured surface roll out one piece of pie dough to a 1/8th inch thickness. Lift and place the dough into the pie dish, fitting it, not stretching it, into place. Place the pie dish into the refrigerator to chill.
3. Heat oven to 450 degrees.
4. On a lightly floured surface roll out the second piece of pie dough. Remove the pie shell from the refrigerator. Brush the edge of the crust with some of the egg wash mixture. Add the cornstarch to the bowl with the fruit and mix until cornstarch has dissolved. Spread the fruit and their juices in an even layer in the pie shell. Top with the second piece of pie dough; trim and seal at the edges and crimp together. Cut a small steam hole into the center of the top crust. Brush the top of the pie with some of the egg wash mixture and sprinkle the top of the pie with some sugar. Place the pie onto a baking tray and place into the oven. Bake for 10 minutes, then lower the oven temperature to 350 degrees and continue baking for 25 minutes. Rotate the pie and continue baking for an additional 20 to 25 minutes, until the pie is golden brown and the filling is bubbling. Remove pie from oven and let cool before serving. 


                        “Farewell, farewell to you, who would hear
                                    You lonely travelers all.
                        The cold north wind will blow again.”
              from “Farewell, Farewell” by Nicholas John Talbot and Richard Thompson

Wednesday, August 21, 2013

A Midsummer's Chicken with Basil Dumplings


The heat and humidity of summer doesn’t put you in the mindset for comfort food such as chicken and dumplings. Lately, the heat has abated (somewhat) and the evenings have been pleasantly cool.
Plus there is all of that great summer produce to use.
If you have a personal aversion to birds (except perhaps to Skylark by Hoagy Carmichael and Johnny Mercer), you could omit the chicken, cram it with local produce and it would be equally good.
Chicken and dumplings is usually a leftover meal. Here, I’m starting fresh. There are three parts to the recipe. First, you have to make the stock and cook the chicken. Next, you take the broth and simmer more vegetables. Lastly, you add the chicken to those simmering vegetables, make the dumplings and drop them into the pot. Cover the pot and let the dumplings cook in the simmering stock.


Chicken with Basil Dumplings
For four servings
Feel free to add any additional vegetables that you like.

3 ears corn
10 to 12 ounces boneless skinless chicken

1. Begin by making the stock. Husk the corn and remove the silk. Cut the kernels off the cob into a bowl. Save the cobs for the stock. Place the corn kernels into a container and refrigerate until needed.
Proceed with the recipe below.
2. While the stock is simmering, prepare the chicken. Fill a sauté pan with 2 cups chicken broth or 2 cups water seasoned with salt and ground black pepper. Place over high heat and bring to a boil. Add the chicken, cover and immediately reduce the heat to a gentle simmer. Turn the chicken after 5 minutes. Poach the chicken until cooked through. Set aside and let cool.

Vegetable Stock
Cobs from the corn
¼ to ½ of a large onion, cut into chunks
2 or 3 carrots, cut into chunks
8 to 10 sprigs flat leaf parsley
1 teaspoon salt
8 to 10 black peppercorns
8 cups cold water
1. Place all of the vegetables and seasonings into a large pot; break the corncobs in half if necessary. Cover with cold water. Place pot onto stove over high heat. When the water begins to boil, reduce the heat to a simmer. Skim the stock occasionally during cooking. Cook until reduced by half, about an hour. Remove pot from heat and let cool. Strain the stock, saving the liquid and discarding the solids.

Assembling the Chicken and Dumplings
If you are not using the chicken, feel free to add additional vegetables such as fresh beans, etc.

½ cup onion, chopped
1 stalk celery, sliced
½ cup sliced carrots
1/3 cup red bell pepper, diced
1 ripe tomato, diced, about 1 ½ cups
salt and ground black pepper
olive oil, for cooking
the reserved vegetable broth
the reserved corn kernels
the cooked chicken, shredded

1. Place a large pan over medium heat. Swirl in 2 tablespoons olive oil. Add the onions, celery, carrots, and bell pepper; season with salt and pepper and sauté for 3 to 4 minutes to begin softening the vegetables. Add the tomato and the corn kernels and stir to combine. Add the reserved vegetable stock and the shredded chicken (if using). Cover the pan and simmer on low while you prepare the dumplings.
2. When the dumpling dough is ready drop rounded spoonfuls of the dumpling dough into the pan; you should get eight dumplings. Cover the pan and simmer for 10 to 12 minutes, until the dumplings are cooked. Remove pan from heat. Divide between four bowls and serve.

Basil Dumplings
makes eight dumplings for this recipe

½ cup all-purpose flour
½ cup plain cake flour
1 teaspoon baking powder
¼ teaspoon salt
dash freshly ground black pepper
2 Tablespoons vegetable shortening
¼ cup chopped fresh basil leaves
½ cup buttermilk (or ½ cup milk, “soured” with ¼ teaspoon white vinegar)

1. Sift the dry ingredients into a bowl. (You could also mix it with a fork; you want to remove any lumps from the cake flour).
2. Add the shortening to the bowl and mix until the shortening is incorporated into the dry mixture; you can use either a fork or a pastry cutter for this.
3. Stir in the chopped basil until evenly mixed; add the buttermilk (or milk) and mix until the buttermilk is evenly incorporated.


R. I. P.  Marian McPartland. You shared your love of your art and illuminated it for all of us all while bringing so many of our heroes closer.

http://www.youtube.com/watch?v=1AH4k_RvyD8

Here is one of her best interviews, with Bill Evans. Evans presents a masterclass on the tune "The Touch of You Lips." http://www.npr.org/2010/10/08/92185496/bill-evans-on-piano-jazz

Tuesday, August 13, 2013

Peach and Strawberry Pie


                                    “Once in a while,
                                                 In a big blue moon,
                                                            There comes a night like this.” *

                                                     Another week = another pie night.

When I was told by one of the farmers at our local market that he was planting strawberries for harvest in the summer, I began thinking of strawberries and peaches together in a pie.


Normally our growing season does not include these two fruits appearing at the same time and since the point of this exercise is to use both what is at the market and when it’s at the market, peaches and strawberries don’t normally intersect.


But they have.
It is also the beginning of freestone peach season. Around here that means peach pie time.
This is a simple adaptation of my peach pie recipe, substituting some strawberries for some of the peaches. And yes (I can’t believe I am saying this) you could use some store bought strawberries but they won’t have the same flavor.
Our strawberries were small so some were kept whole while others were sliced in half.
Peaches and strawberries are a delicious combination in a pie but not a common one for us to experience.
“This pie is like Halley’s comet. How long until we see it again?”
 We can hope it’s not 75 years.


Peach and Strawberry Pie
You will need dough for a double crust pie

4 cups peaches, pitted, peeled, and sliced (about 2 ¼ pounds)

1 ½ cups strawberries, stems removed and sliced
½ cup sugar
3 Tablespoons corn starch
egg wash-1 egg mixed with 1 Tablespoon water

1. Peel, pit and slice the peaches and place them into a bowl. Rinse the strawberries. Remove the stems and slice them in half or quarters, depending on their size. Add the sugar and stir. Set aside for 20 to 30 minutes.
2. On a lightly floured surface roll out one piece of pie dough to an 1/8th inch thickness. Lift and place the dough into the pie dish, fitting it, not stretching it, into place. Place the pie dish into the refrigerator to chill.
3. Heat oven to 450 degrees.                                        
4. On a lightly floured surface roll out the second piece of pie dough. Remove the pie shell from the refrigerator. Brush the edge of the crust with some of the egg wash mixture. Add the cornstarch to the bowl with the fruit and mix until cornstarch has dissolved. Spread the fruit and their juices in an even layer in the pie shell. Top with the second piece of pie dough; trim and seal at the edges and crimp together. Cut a small steam hole into the center of the top crust. Brush the top of the pie with some of the egg wash mixture and sprinkle the top of the pie with some sugar. Place the pie onto a baking tray and place into the oven. Bake for 10 minutes, then lower the oven temperature to 350 degrees and continue baking for 25 minutes. Rotate the pie and continue baking for an additional 20 minutes, until the pie is golden brown and the filling is bubbling. Remove pie from oven and let cool before serving.


*Joni Mitchell  Night Ride Home

                                                                  And, in the end.....


Wednesday, August 7, 2013

Birthday Pie: Apricot and Sour Cherry


                       “They say it’s your birthday. It’s my birthday too, yeah.” *


I had never known someone who shares my birth date. There are several that are close, but not exact. It turns out that one of our pie night co-conspirators (we’ll call her the Equally Eminent Mosaicist) and I have the same birth date (same day, different years). Her husband, the Eminent Botanist, was born one day later.
Our youngest daughter shares her birthday with a tragedy, September 11.
When she gives out her birthday she sometimes gets an occasional look. It used to make her feel uncomfortable and your birthday should never make you feel uncomfortable.
One of Anna Quindlen’s children was born on Sept. 11. I read (or heard) that she was quick to point out that “9/11” was something that happened to the country, but “September 11 is your birthday.” When youngest daughter was old enough to understand, we explained the same thing to her.

We went out together for some Greek food and since it was pie night, pie, not cake, was in order.


I used some of the sour cherries I had put away in the freezer. Two cups of sour cherries usually require six tablespoons of sugar. The apricots were sweet so I halved the amount of sugar that I usually use for that amount of apricots so the total amount of sugar I used is ½ cup for this pie. Taste your apricots and decide if they need additional sweetening. The frozen cherries gave off a lot of juice as they thawed so you may not want to put all of the accumulated juice into the pie.

Apricot and Sour Cherry Pie
You will need pie dough for a double crust pie          


1 pint apricots (a generous 2 cups when quartered)
2 cups pitted sour cherries
½ cup sugar (maybe extra)
4 Tablespoons cornstarch
egg wash- 1 egg mixed with 1 Tablespoon water

1. Rinse and pit the apricots; quarter them lengthwise and place them into a bowl. Add the cherries to the bowl along with the sugar; mix to combine. Set stand for at least 20 minutes.
2. On a lightly floured surface roll out one piece of pie dough to an 1/8th inch thickness. Lift and place the dough into the pie dish, fitting it, not stretching it, into place. Place the pie dish into the refrigerator to chill.
3. Heat oven to 450 degrees.
4. On a lightly floured surface roll out the second piece of pie dough. Remove the pie shell from the refrigerator. Brush the edge of the crust with some of the egg wash mixture. Add the cornstarch to the bowl with the fruit and mix until cornstarch has dissolved. Spread the fruit and their juices in an even layer on the bottom the pie shell. Cut the second piece of dough into strips and weave them into a somewhat tight lattice with little of the filling showing. Trim the edges of the lattice pieces, then seal and crimp the crust. Brush the top of the pie with some of the egg wash mixture and sprinkle the top of the pie with some sugar. Place the pie onto a baking tray and place into the oven. Bake for 10 minutes, then lower the oven temperature to 350 degrees and continue baking for 25 minutes. Rotate the pie and continue baking for an additional 20 minutes, until the pie is golden brown and the filling is bubbling. Remove from oven, let cool and serve. Celebrate.


* Birthday, by Lennon & McCartney, like you didn’t know already.

Images from the Samuel Yellin gate, Gwynedd Mercy College, Gwynedd, PA

Tuesday, August 6, 2013

Eat With Your Fingers! Flatbreads!


I will be the first to exhort you to make something from scratch. But there are times when even I want a break. To quote Jacques Pepin, “Let the supermarket be your sous chef.”
There are many varieties of pre-made flatbreads available in the grocery store. From rectangular, thin-crusted ones to white or whole wheat Indian naan, the toppings are only limited by your imagination. If you want to make your own flat bread dough, by all means do it. Using pre-made makes it easier to do it frequently and faster.
One night youngest daughter and I embarked on a flatbread fest, using ingredients we had on hand or had recently purchased for such a dinner. Flatbreads such as these also work as finger food with drinks when friends are over.
We set up the oven as we do for pizza, with a pizza stone that we preheated. We crisped the flatbreads in the oven before topping them. Youngest daughter acted as our sous chef, assembling them based on combinations I sketched out. She ended up styling them like a pro. Since our kitchen is small, it lead to some well choreographed cooking: “Coming behind you.” “Oven door open.” “Watch your back.”  “Reaching in front.” “Hot!”
Each flatbread made four servings but since there were three of us, it meant deciding which one we wanted again without stealing it away from someone else. Tough choice.
But if you made four flat breads, that would have made sixteen slices so there was still one extra slice left. Who got that last piece?”
Our sous chef, of course.

Most of the flatbreads had a combination of shredded cheeses found in the grocery store which served as the base to hold the ingredients in place.

Our combinations:


Fresh diced tomato, mixed with salt, ground black pepper, and extra virgin olive oil, minced garlic, crumbled bacon, chili flakes, cheddar cheese, and shredded basil added after it came out of the oven.


         Hot sausage (precooked and sliced) on top of zucchini pesto* with crumbled goat cheese.


                       Ripe figs with crumbled blue cheese (we used some Stilton) and prociutto.


Potato (cooked, cooled, and sliced) sprinkled with some salt, chopped garlic, chopped rosemary, ground black pepper, extra virgin olive oil, and grated Gruyere cheese.


*Zucchini Pesto
2 cups zucchini pieces
1 cup fresh basil leaves
2 teaspoons chopped garlic
1 teaspoon salt
¼ teaspoon ground black pepper
1 Tablespoon grated Parmesan cheese
1 cup extra virgin olive oil.
1. Cook the zucchini pieces in salted boiling water until tender, about 5 minutes. Drain and refresh under cold water. Set zucchini aside until cool.
2. When the zucchini has cooled, place the zucchini and the remaining ingredients into a blender and process until smooth. Store the zucchini pesto in a covered container in the refrigerator. Use it as you would use any pesto.