Wednesday, August 29, 2012

Bread + Tomatoes = Panzanella


A good bakery is a welcome addition to any community; a great one is a gift. That is what Alice Bakery in downtown North Wales has become since opening its doors a year and a half ago. Everything is made from scratch every morning. If you are going to indulge in your daily carbs, this is the way to do it.
Owner Dennis Darr, who named his bakery after his grandmother (it’s pronounced “a-lease”), graduated from the French Pastry School in Chicago. When looking around at schools, the French Culinary Academy in New York City told him that Chicago's French Pastry School was ranked number one in the nation. After a trip to see the school, there was no need for further decisions.
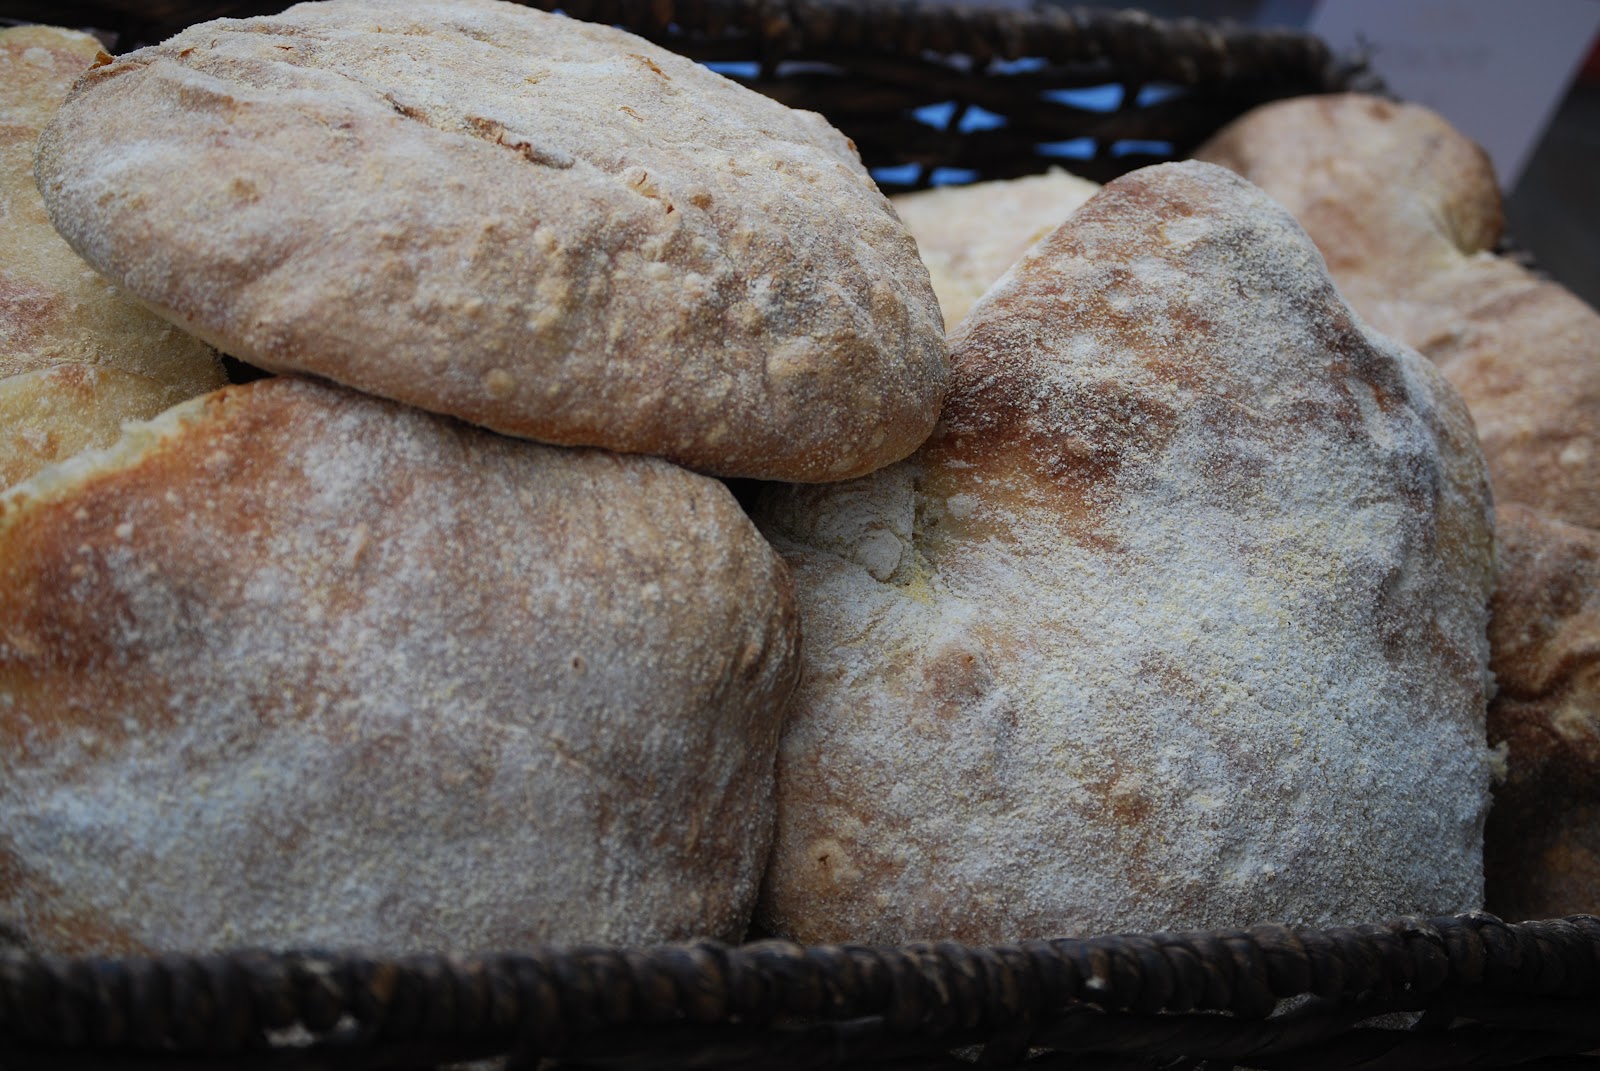
The business has grown steadily. Dennis and his crew make and sell breakfast pastries, desserts, custom cakes, handmade chocolates (when the weather cooperates) and of course, bread. They also serve  lunch.

Thinking of Alice's breads gets me thinking of panzanella, the Italian bread and tomato salad.  Tomatoes are abundant right now, especially at farmers markets and local roadside stands. Use heirlooms, small cherry tomatoes, whatever is best. Cut some leftover bread (like the kind at Alice) into cubes, mix it with the tomatoes and a vinaigrette and you have panzanella. I should point out that our youngest daughter doesn't like raw tomatoes, only cooked ones, but she will eat around the tomatoes in order to get to the the bread which has absorbed the tomato juices and vinaigrette. Yes, we're a little wonky around here.

Panzanella
This makes enough for two. It can easily be increased (more tomatoes, more bread, etc) to serve a larger crowd.

1 cup day old bread, cut into 1/2" cubes              
2 cups tomatoes, diced 
¼ red onion, sliced
8 to 10 oil cured olives, pitted
1 teaspoon capers
¼ cup torn fresh basil leaves
2 Tablespoons balsamic vinegar
6 Tablespoons extra virgin olive oil
salt and ground black pepper

1. In a medium-sized mixing bowl, whisk together the olive oil and balsamic vinegar. Add the tomatoes, onion, olives, and capers to the bowl: season with salt and ground black pepper. Let the tomatoes sit and marinate. About 2 minutes before serving, add the bread cubes and the basil. Mix together and allow the bread to soften by soaking up the vinaigrette. Divide into two portions and serve, avoiding the tomatoes, if you are so inclined.


                                                  http://www.alicebakery.com/


Red Quinoa Salad with Grilled Corn and Peaches


                                    “Blow up your T.V., throw away your paper,
                                          Go to the country, build you a home.
                                     Plant a little garden, eat a lot of peaches….”*


This is a simple salad, one which can be eaten by itself or as an accompaniment to a meal. It can, of course, be made with the regular (non-red) variety of quinoa, too. You can augment it with additional vegetables, such as peeled and diced cucumber, cherry tomatoes, etc. Because my cooking in the summer tends to be rather “basil-centric,” I opted to use mint, but you could just as easily use fresh basil; peaches and basil work well together.
You could also “grill” the corn directly over the flame of a gas stove or simply slice the corn off the cob and simmer it in lightly salted water for about 3 minutes, then drain and refresh it under cold water.


Red Quinoa Salad with Grilled Corn and Peaches
For 4 to 6 servings

¾ cup red (or plain) quinoa
1½ cups water
¼ teaspoon salt
2 ears of corn, grilled
2 ripe peaches, peeled and diced (a little over 1 cup)
½ cup red onion, diced
2 Tablespoons chopped fresh mint
2 Tablespoons olive oil
1 Tablespoon balsamic vinegar
salt and ground black pepper, to taste

1. Place the water into a medium-sized saucepan and season with salt. Place the pan over high heat and bring the water to a boil. Add the quinoa and stir. Cover the pot and lower the heat to a gentle simmer. Cook for 15 minutes or until all of the water is absorbed. The quinoa will be tender and the germ ring, which will look like a small thread, will be visible. Drain the quinoa in a fine strainer, refresh under cold water and let cool.

2. Cut the grilled corn off of the cobs into a medium-sized mixing bowl. (If you skipped the grilling and simmered the corn off the cob, add it to a mixing bowl). Add the diced peaches and onion to the bowl and mix together. Add the cooled quinoa and the mint and mix to combine. Add the olive oil and balsamic vinegar and mix to dress the salad; season with salt and ground black pepper. Refrigerate the salad, covered, until needed. Taste for seasoning before serving.

*from Spanish Pipedream, by John Prine

Sunday, August 12, 2012

Preserved Lemons

"I'm so tired, tired of waiting, tired of waiting for you.." *


Preserved lemons are a finishing condiment unique to Moroccan cooking. Strictly speaking, they are a type of pickle, since they are being "transformed" into something else while soaking in a brine. They just take longer than your standard refrigerator pickle.
While preserved lemons may not be noticed if omitted in a recipe, once you use them, you’ll want to have them on hand. They have become an ingredient that have been adopted by chefs and used in different ways. Making preserved lemons is easy; this is really a set of instructions. This is the way I learned from a Moroccan chef/friend. Each Moroccan may have her or his own personal twist to the preparation. All you need are lemons, kosher salt, and lemon juice (the bottled kind found in the grocery store works well for this preparation) plus a couple of clean jars, depending on how many you are planning to make. My friend uses pickling spice as a flavoring to make his; it’s not essential. It just adds another dimension to the finished product. Some use cinnamon sticks. Except for the process, there is no “correct” recipe.

Preserved Lemons:
Lemons
Kosher Salt
Bottled lemon juice
Picking Spice (optional)
To prepare preserved lemons, wash the jars thoroughly. Wash the lemons and dry them. Slice the lemons in half, lengthwise, but leave them attached at the bottom. Cut the lemons again into quarters, leaving them attached at the bottom.
Over a bowl, generously pour salt over all the cut surfaces. Place the salted lemons into the jar; if they don’t fit whole, you can halve them. Fill the jar with as many lemons as will fit. If you are using the pickling spice, spoon a tablespoon of it into the jar. Pour lemon juice into the bowl to dissolve the excess salt and pour this over the lemons in the jar, along with enough lemon juice to fill the jar. Cap the jar, turn it upside down a few times and place the date on the lid. Leave the lemons at room temperature for a day or two, and then refrigerate them. Then wait. The process of preserving takes about two months, but then you’ll have your first supply of preserved lemons.
I know that someone said that the waiting is the hardest part but once they have been made, your hard work is all done.
I’ll get back to you with some recipes, but you’ll have to wait.


*Tired of Waiting,  lyrics by Ray Davies
(How many more song cliches can I pull out for this one?)


Rotini with Summer Vegetables and Goat Cheese


(Listening: Stefano Bollani : Stone In The Water )

It comes as no surprise that there is dish like ratatouille. A quick look around a farmers’ market right now and you will see everything you need to make it: tomatoes, eggplant, zucchini, peppers, onions, garlic, and basil. Necessity (dinner) is the mother of invention (use what you have at hand).
For a recent dinner, I combined all of these vegetables into a sauce for pasta. Enriched with a little goat cheese and grated Parmesan, it was a forkful of summer. I’m not usually one who insists on using a specific pasta for a recipe (yes, I do know some work better than others at times) but this sauce is perfect for rotini. The sauce coats the noodles and gets into the corkscrew-like edges.
Since eggplant soaks up a lot of oil when it cooks, I roast it in the oven until it softens and then toss it into the rest of the vegetables. Use any fresh, ripe tomato for the sauce.
Often the vegetables for ratatouille are cooked separately but that’s not necessary here.
If the sauce is ready before the pasta, set the pan aside while you wait for the pasta. The trick is to eventually be able to time everything to be ready at the same time, but that’s a matter of practice.


Rotini with Summer Vegetables and Goat Cheese
For four servings: Figure ½ to 2 ounces dried pasta per serving.

8 ounces rotini pasta
1  medium-sized eggplant
1 medium-sized zucchini, about 1 ½  cups diced
1 cup chopped onion
½  cup red bell pepper, diced
1 Tablespoon minced garlic
2 cups tomatoes, chopped
red pepper flakes, to taste (optional)
¼ cup chopped fresh basil
4 ounces goat cheese
3 to 4 Tablespoons grated Parmesan cheese
Olive oil, for cooking
Salt and ground black pepper

1. Heat oven to 350 degrees. Peel and dice the eggplant into ½” sized pieces, there should be about 2 cups of diced eggplant. Place the eggplant into a bowl; season with salt and black pepper and drizzle with 2 to 3 tablespoons olive oil. Mix to combine. Place the eggplant in one layer on a baking pan lined with a piece of parchment paper or a silicon mat. Bake for 10 to 12 minutes until it begins to soften.
2. While the eggplant is cooking, place a large sauté pan over medium-high heat. Swirl 2 tablespoon olive oil into the pan. Add the onion and bell peppers and sauté for 2 to 3 minutes to soften. Add the zucchini; season with some salt and pepper. Ladle about ½ cup of the pasta water into the pan. Cover the pan and lower the heat to a gentle simmer.
3. When the eggplant has roasted, remove it from the oven. Place the eggplant into the pan with the vegetables. Add the garlic and stir. Add the tomatoes and the chili flakes, if using, along with the basil. Season with salt and ground black pepper and stir in 1 or 2 tablespoons of extra virgin olive oil. Cover, lower the heat and simmer to break down the tomatoes, about 5 minutes. Set aside the pan.
4. Cook the pasta in salted boiling water as directed until al dente. Drain the pasta.
5. Return saucepan to the heat. Add the rotini to the pan. Scatter the goat cheese and grated Parmesan cheese over the pasta and stir to melt the cheese and coat the pasta. Divide the pasta  between four bowls. Drizzle with a little extra olive oil and serve. Ah, summer!


Pickles, Part Two: Bread and Butter Pickles


                                         “It was late last night the other day
                                             I thought I’d go up and see Ray
                                               So I went up and I saw Ray
                                    There was only one thing Ray could say, was:
                                                   I don’t want a pickle
                                       Just want to ride on my motorsickle,”*

Bread and Butter Pickles / Summer Corn Relish


There are those who favor dill pickles and others who like bread and butter pickles. Our friend, the transplanted Texan, loves bread and butter pickles so I put a quart jar together for her. The brine can be used for pickling mushrooms and other vegetables. The brine ratio (equal parts white vinegar/water/sugar) is similar to some “Asian-style” pickling brines (think carrot curls, small florets of cauliflower, zucchini etc. for pre-dinner grazing).

While the tumeric and mustard seeds are often included in a bread and butter pickle recipe, you will still get great results if you don’t use them.


Bread and Butter Pickles
For one quart

1 quart of Kirby cucumbers
½ cup white vinegar
½ cup water
½ cup sugar
½ teaspoon salt
½ teaspoon powdered tumeric (optional)
1 teaspoon yellow mustard seeds
chili flakes, to your liking

1. Wash the cucumbers and dry them. Slice the cucumbers crosswise into ¼” thick slices. Pack the cucumber slices into a clean one quart jar. Sprinkle the mustard seeds and chili flakes over the cucumber slices, if using.

2. Prepare the brine by placing the vinegar, sugar, water, salt, and tumeric into a saucepan. Stir to dissolve the sugar and salt and bring the brine to a boil. Ladle the hot brine into the jar until the brine reaches about 1” from the top of the jar, covering all of the cucumber slices. Cover and seal the jar with the lid and let stand until cool. Refrigerate the pickles for a week before enjoying.


Summer Corn Relish
This corn relish is my variation on a Pennsylvania Dutch-style corn relish. I omit the cabbage often found in such relishes and keep it simpler. The PA Dutch are accomplished picklers. This summer corn relish is great as a simple, pull-it-from-the-refrigerator accompaniment for grilled meats and fish.

Summer Corn Relish:                                                                        
For 1 quart
 
6 ears corn
½ cup diced onion
½ cup diced red bell pepper
1 jalapeno pepper, diced (or to taste)
½ teaspoon freshly ground black pepper
½ cup white vinegar
½ cup water
½ cup sugar
½ teaspoon salt
1. Husk the corn. Slice the corn off the cobs into a bowl. Add the onion, red bell pepper, and jalapeno to the bowl; season the vegetables with the ground black pepper. Mix the vegetables together and spoon them into a clean one quart jar.
2. Prepare the brine by placing the vinegar, water, sugar, and salt into a saucepan. Stir to dissolve the sugar and salt and bring the brine to a boil. Ladle the hot brine into the jar until it reaches about 1” from the top, covering the vegetables. Cover and seal the jar with the lid and let stand until cool. Refrigerate the relish for a week before using.

So why exactly are they called bread and butter pickles? To better research the question, I stopped at the local library; a library is like the Internet only you have to do more looking for yourself. I found a dusty old tome, “The History of the Bread and Butter Pickle in These Here United States (unabridged and annotated)” The story goes that while “dill pickles sold well” for one intrepid canner, it was the “sweet and sour pickles I make that are my real bread and butter.”
Hey, you read it here on the Internet so it must be true.

*from  The Motorcycle Song, words and music by Arlo Guthrie

And you can’t discuss bread and butter without mentioning the Newbeat’s song of the same name. It has nothing to do with pickles. It’s one of the many songs warning of the consequences of not cooking for a loved one. Hey, is that a young Bill Clinton?
                             http://www.youtube.com/watch?v=Idlnba_0iPM&feature=fvwrel


Wednesday, August 8, 2012

Swiss Chard Enchiladas Suizas


Listening: Chick Corea: Now He Sings, Now He Sobs )

If you have Swiss chard in your garden, like our friend the Eminent Botanist, you know it can be continually harvested throughout its growing season. It also has nothing to do with Switzerland. It is probably Sicilian. It was given the Swiss designation to distinguish it from French spinach in old seed catalogs. It is also related to the beet, except we only eat the leaves of the chard plant. Best of all, it is highly nutritious.
Bunches of different colored chard were on sale at the Jus Kiddin Around Farm stall run by Linda and Pete Kloss. They also happen to supply produce to the Curious Goods at the Bake Oven Inn, a restaurant run by my friend Chef Mark Muszynski and his wife, Catherine in Germansville, Pa. 
                                                 http://www.eatcuriousgoods.com/
Seeing the chard meant there was no better time to make these enchiladas filled with Swiss chard and roasted peppers. Enchilladas Suizas (Swiss enchiladas) are the creation of  Sanborn’s in Mexico City. Instead of being sauced with a chile sauce, they are made with a creamy, cheesy sauce based on the French béchamel. (Since it has cheese, it would be based on a Mornay sauce, but I digress). I had written the recipe using poblano peppers, but I found yellow bell peppers at the market and made the substitution.
The filling makes enough for four or five servings, with two enchiladas per serving.  The recipe can be prepared in parts (the filling and the sauce) and kept refrigerated until assembled.


Swiss Chard Enchiladas Suizas
This makes enough filling for 8 to 10  six” enchiladas

The filling:
1 bunch* Swiss chard
3 poblano peppers (or two medium red or yellow bell peppers)
2 cups chopped onion
1 or 2 cloves garlic, minced
salt and pepper
olive oil for cooking

1. Roast the poblanos or bell peppers under a broiler or, if you have a gas stove, they can go right on top of the burner.  Turn the peppers until blackened on all sides. Remove the peppers and place them into a bowl.  Cover with plastic wrap and let cool.

2. To prepare the chard, strip the leaves from the stems. Set aside the stems. Tear the leaves into smaller pieces and rinse them under cold water. Slice the chard stems crosswise into ½ “ pieces and set aside.  Place a sauté pan with ½ cup lightly salted water over high heat. Cover the pan until the water comes to a boil. Add the chard leaves to the boiling water, cover and cook until tender, about 5 to 6 minutes. Stir occasionally as they cook. When the leaves are tender (taste to test), drain them in a colander, refresh under cold water and let stand to cool.

3. Return pan to the stove over medium-high heat. Swirl in 2 to 3 tablespoons olive oil. Add the onions and cook for 4 to 5 minutes; if they brown a little, it’s alright; don’t burn them. Add the chard stems, season with salt and pepper and stir. Cover, reduce heat and cook until stems are tender, about 8 to 10 minutes. Stir occasionally. Add the garlic at the end and cook for 30 seconds. Remove from heat and let cool.

4. While the stems are cooking, clean the roasted peppers. Pull the stems out of the peppers and split each one in half lengthwise. Remove all of the seeds. Using the back of a knife, scrape off the charred skins. (Don’t be tempted to clean the peppers under running water. You’re washing away flavor) When the peppers have been cleaned, set aside 1 of the poblano peppers (or 1/3 of the bell peppers) peppers for the sauce. Slice the remaining peppers lengthwise into thin strips and add them to the stem mixture.

5. Squeeze excess water from the chard leaves and chop them. Place the stem mixture into a small bowl. Add the chopped leaves and the sliced roasted peppers and mix to combine. Cover and refrigerate. At this point the filling can remain refrigerated for 2 to 3 days.


Suiza Cheese Sauce
4 Tablespoons unsalted butter
4 Tablespoons all-purpose flour
3 cups milk
salt and ground black pepper
6 ounces grated jack or Chihuahua cheese
1 jalapeno pepper (to taste) cut into small dice

Note: The reserved poblano peppers or bell peppers, cut into small dice will be added to the sauce at the end

1. In a medium-sized saucepan over medium heat, melt the butter. Whisk flour into melted butter to make a roux. Lower the heat and cook for 1 to 2 minutes.

2. Add milk to the roux and whisk to combine. Raise the heat and bring to a boil, whisking throughout. When the white sauce has thickened, remove pan from heat. Season with 1 teaspoon salt and ground black pepper. Add the grated cheese, stir until melted and set sauce aside. If making the sauce ahead of time, cover the sauce with a piece of plastic wrap pressed directly onto the top of the sauce. (The sauce can be transferred to a container and stored in the refrigerator until needed. Press a piece of plastic wrap onto the top of the sauce before refrigerating it).

To assemble:
8 to 10   6” flour tortillas

1. Heat oven to 250 degrees. Lightly grease a 9” x 13” baking pan.

2. Wrap the tortillas in foil and warm them in the oven; it will make them easier to roll. Lightly cover the bottom of the baking pan with some of the cheese sauce. Spoon about 2/3rds of the sauce into the Swiss chard mixture and stir to combine. Mix the reserved diced roasted peppers into the remaining sauce and set aside.

3. Remove the tortillas from the oven. Turn the oven up to 350 degrees. Divide the chard filling into eight or ten portions.   Place the filling onto bottom third of a tortilla and roll the tortilla closed. Place the enchiladas into the baking pan and repeat until all the enchiladas are made.

3. Spoon the remaining sauce over the enchiladas. Place the enchiladas into the oven and bake for 20 minutes, at which point the sauce should be bubbling. Remove from the oven and serve.


*O.K., what do you mean by a “bunch” of Swiss chard? Well, that’s how you find it at the market or  in the store, of course. Does bunch size vary? I would guess that they’re probably consistent. The past two times I made this, the bunch I used weighed almost a pound. If you have it in your garden use a pound of chard leaves.


Peach Pie


                      “We abound in the Luxury of the Peach.”
                          - Thomas Jefferson to Martha Randolph, August 31, 1815


(Listening: Bobo Stenson:  Goodbye )


Along with tomatoes, I await peach season, specifically for freestone peaches since they make preparing peaches for pies, preserves, ice cream, etc. so much easier.
Thomas Jefferson grew over thirty eight different varieties of peaches in his South Orchard at Monticello. George Washington, never the “completist” as Jefferson, only noted having two varieties of peaches at Mount Vernon.
The peach was probably introduced from Europe to southern North America by either Spanish or French explorers in the mid 16th century where it moved north. John Smith noted that peach trees were in Jamestown around 1629. William Penn found them near Philadelphia in 1683. Peach trees had naturalized so abundantly by the beginning of the 18th century that British explorer, naturalist and writer John Lawson noted that peach trees grew like weeds.
Peach pies were far from the minds of colonial America. While I would guess that they were eaten, peaches went to fed hogs on many Virginia plantations. Typical of those heady, alcohol-fueled days, peaches were fermented into cider or distilled into brandy.
Since I have included pie dough recipes and directions in earlier posts, I skip them here but they are easily accessible. 

Peach Pie
For  one 9”  double crust pie

6 cups peeled, sliced ripe peaches (about 1 ½ quarts or about 3 pounds of peaches)
½ cup sugar
3 Tablespoons cornstarch
½  teaspoon ground cinnamon

1. Heat oven to 450 degrees. Place the sliced peaches and sugar into a bowl and stir. Let the peaches stand for 30 minutes to release some of their juice.

2. Add the cornstarch and cinnamon to the peaches and stir to combine. Pour the peaches and their juice into the prepared pie shell. Cover with the top crust, sealing the edges. Cut a small steam hole into the center of the pie. Place the pie on a baking pan. Place the pie into the oven and bake for 10 minutes. After 10 minutes, lower heat to 350 and continue baking for 45 to 55 minutes, until the filling is bubbling. Remove pie from oven and let cool before serving.