Wednesday, May 22, 2013

Spring = Asparagus

Two recipes for the arrival of local asparagus.


Asparagus Tart with Ramps and Cheddar Cheese
I used ramps in the tart because I found them at a local farm market. Stores such as Whole Foods or Wegman’s also carry them in the spring. You could substitute with a cup of sliced leeks sautéed with 1 teaspoon minced garlic. I used a square tart pan but a 9" round tart pan works just as well.

Tart Crust
For one 9” crust
1 ½ cups all-purpose flour
½ teaspoon salt
2 Tablespoons cold unsalted butter
6 Tablespoons shortening
6 Tablespoons cold water

1. Place the flour and salt into the bowl of a stand mixer. Add  the butter and 2 tablespoons of the shortening to the flour and mix until it forms small crumb-sized pieces. Add the remaining shortening and mix, leaving larger sized pieces of shortening. Add the water and mix until the dough comes together. Remove the dough from the bowl and shape it into a flat round disk. Cover with plastic wrap and refrigerate for at least one hour before use. Alternatively, the dough can be mixed by hand using a fork or pastry blender.
2. Remove the chilled dough from the refrigerator. On a lightly floured surface, roll out the crust dough until 1/8th inch thick. Fit the into a 9” tart pan, trimming any overhanging dough with your thumb. Using a fork, lightly prick the bottom and sides of the tart shell. Refrigerate or freeze the tart shell for 20 to 30 minutes before baking.

For the tart:

12 ounces asparagus spears
¼ pound ramps
3 or 4 strips bacon (optional)
4 ounces sharp cheddar cheese, grated
1 ounce goat cheese, crumbled

1. Snap the ends off of the asparagus spears. Using a vegetable peeler, peel the bottom 1” of each spear. Place a pan with ½ cup lightly salted water over high heat. Add the asparagus, cover and cook until tender; test by pressing the point of a knife into the thickest part of the stem. 
Remove from heat, drain in a colander and refresh under cold water. Set aside.

2. Wash the ramps under cold water, removing any dirt. Trim the bottoms and slice the ramps crosswise into 1/8” pieces. Continue cutting, slicing the leafy part of the ramps into thin ribbons. Place the sauté pan back over medium heat. When hot, swirl in one tablespoon olive oil. Add the ramps and sauté until softened and the leaves have wilted. Remove from heat. This may not appear to be enough ramps for the tart but their flavor is strong enough for such a small amount.
3. Cook the bacon until crisp then drain on paper towels. Set aside.
5. Heat oven to 375 degrees. Remove the tart shell from the refrigerator or freezer. Place the tart shell on a baking tray. Line the shell with a piece of aluminum foil. Fill the foil with dried beans, rice or pie weighs. Place the tray with the tart shell into the oven and bake for 12 minutes. Remove partially baked tart shell from the oven; carefully lift out the foil with the pie weights. Return the tart shell to the oven and bake for and additional 5 minutes. Remove from oven and set aside to cool.


The custard:
2 eggs
¾ cup half and half
½ teaspoon salt and ¼ teaspoon ground black pepper

To assemble the tart, mix together the custard ingredients in a bowl until blended.  Keeping the tart shell on the baking tray spread the ramps (or sautéed leeks/garlic mixture) evenly on the bottom of the tart shell. Crumble the bacon into the tart shell; top with the asparagus spears. Spread the cheddar cheese over the tart and top with the crumbled goat cheese. Pull out the oven rack, place the tray with the tart shell onto the rack and fill the tart with the custard mixture; use only enough to fill the shell. Carefully slide the rack into the oven and bake the tart for 28 to 30 minutes, until the custard has set. Remove from oven and let cool before serving. Remove the asparagus tart from the tart pan, slice and serve.  


Asparagus Pizza with Fontina, Prociutto, and Goat Cheese


It is impossible to get brick oven quality pizza out of your home oven but there are some tricks and techniques that will bring it closer. You need to use a pizza stone. I move one oven rack to the bottom of the oven, the hottest spot, and let the stone preheat for at least 20 to 30 minutes. Another trick is one I picked up from baker Jim Lahey of NYC’s Sullivan Street Bakery. Lahey suggests finishing the pizza under the broiler.

While the broiler is located on the top of an electric oven, it’s usually located under a gas oven, which can be a bit trickier. If you choose to go for some extra browning under the broiler, keep an eye on the progress of the pizza under the broiler. You want to look for some nice dark spots like the kind you would get in a very hot brick pizza oven.

Baking pizza in a home oven requires a little extra work. The way I have done it over the years is as follows. I always slightly bake the crust before topping it. After the crust is formed and is on the baking disk (a round pizza tray) I put it in the oven for about five minutes to let it rise slightly and firm up. I pull it before it gets any color and let it cool slightly. Before you build the pizza, make certain the crust is free of the pan so it can slide off the pan and into the oven directly onto the pizza stone. You might want to rotate the pizza during the cooking since all ovens have hot spots. If you decide to finish the pizza under the broiler, remove the pizza when it’s almost finished baking and turn on the broiler. Return the pizza to the oven under the broiler, taking care to watch it as it browns. I have a gas range and the broiler is under the oven so I have to put the pizza back onto the pizza pan and slide the pan with the pizza on it under the broiler. 

Practice does makes perfect, or somewhere close. You could also learn to make pizza outdoors on your grill.


Asparagus Pizza with Fontina, Prociutto, and Goat Cheese
If you don’t like the flavor of raw garlic, you can sauté the garlic in olive oil for a few minutes to soften its flavor.

Needed: one recipe pizza dough

2 cups asparagus, sliced into 1” pieces on the bias
4 ounces Fontina cheese, grated
3 to 4 slices prociutto
2 to 3 Tablespoons goat cheese
1 Tablespoon minced shallot
ground black pepper
garlic oil: 1 to 2 teaspoons minced garlic mixed with 2 to 3 Tablespoons extra virgin olive oil

1. Heat oven to 450 degrees. Place pizza stone into the oven and let it heat for 20 to 30 minutes.
2. Blanch the asparagus pieces in boiling salted water until tender; they should pierce easily with a knife poiunt. Drain the asparagus into a colander and refresh under cold running water. Set aside.
3. Prepare your crust. If you are using my pizza dough recipe, use plenty of flour. Sprinkle your pizza pan with flour and cornmeal. On a well-floured surface, pat the dough out into a circle then lift the dough and continue shaping the dough over the back of your hands; keep your fingers bent under to avoid tearing the dough. The dough should be very soft and easy to work. Shape the dough into a 13 inch circle; exact geometry isn’t necessary. Place the dough onto the pan and bake for 1 to 2 minutes to set the dough. Remove from oven.
2. Turn oven up to 500 degrees. Assemble the pizza: Make sure the crust is not stuck to the pizza pan. Spread  2 to 3 Tablespoons of the garlic oil  and the minced shallot over the bottom on the pizza. Spread about ½ of the grated Fontina cheese onto the crust. Scatter the asparagus pieces over the crust. Tear the prociutto into pieces and drape it over the pizza. Finish with the remaining Fontina and crumble the goat cheese over the pizza. Season with some ground black pepper.
3. Place the pizza directly onto the pizza stone and bake for 10 to 12 minutes. Baking times will vary depending on your oven. Rotate the pizza once or twice as it bakes. If you want to finish the pizza under the broiler, remove it just before it appears to be done, turn on the broiler and return it to the oven under the broiler for a few extra minutes. Watch the pizza as it cooks under the broiler. Remove the pizza from the oven and let stand for a couple of minutes before slicing and serving. 


Pizza Dough

I have adapted this recipe from one by the great baker, teacher, and author Peter Reinhart.  Far be it from me to find a problem with one of his recipes but dough recipes generally need a bit of tweaking. This dough if a softer style dough than what you may be used to. It’s what Reinhart refers to as “Neo-Neapolitan Style,” the type similar to the kind  you would find at brick oven style pizzerias. You may, of course use any pizza dough. Make your dough in advance if you can since a slow rise in the refrigerator gives the dough more flavor.  If you are concerned about working with a soft, sticky dough, you can add a small amount of additional flour to tighten the dough

Pizza Dough
For two 10 ounce dough balls

11 ¾ ounces or 2 ¼ plus 2 Tablespoon King Arthur all-purpose flour
½  teaspoon yeast (Rapid Rise, or similar "instant" style yeast)
1 teaspoon salt
1 Tablespoon olive oil
1 cup warm water

1. Mix together until the dough comes together and forms a ball. It will be tacky to the touch, even a bit sticky. Scatter about 1 tablespoon flour onto a clean surface. Remove the dough from the bowl and knead the dough in the flour for about 4 to 5 minutes; add a little more flour if necessary. The dough should be smooth but tacky or even sticky to the touch; if you press the dough ball with your finger, the dough should spring back. Divide the dough into two equal (10 ounce) pieces. Oil the dough balls generously and place each dough ball into its own sealable plastic bag. Let the dough rest for 15 minutes then refrigerate the dough overnight or freeze if for a later use. If you want to use the dough the same day, let the dough rise for at least an hour. All dough is best made in advance and allowed to “age” in the refrigerator. Pull any chilled dough out of the refrigerator for a hour or so to warm before use.

Listening: The Wayne Shorter Quartet: "Without A Net" 
The legendary sax player turns 80 this August 25. Here he is from 2003.


Wednesday, May 1, 2013

Mussels: Two Ways Two Days


“What do I do when my love is away?”*

My red-haired food co-pilot went away recently and I was left to cook, for one, which is something that I haven’t done in a long time. But it gave me a chance to make something I like but she doesn’t. There isn’t too much that she won’t eat, but mussels are one of them. I went and bought a two pound bag of cultivated mussels which was more than enough for two meals and began thinking of how I wanted to prepare them.
Mussels are an easy dinner and an inexpensive one too and they can be prepared in many ways: steamed in white wine or with beer and leeks, or Thai style with green curry and coconut milk. You get the idea. I was leaning toward white wine and garlic when I felt a stuck-in-a-rut moment coming on. If being stuck in a food prep rut has a soundtrack, think of Billy Gibbons’ hard crunching, gear grinding guitar sound. Yeah, it was a pretty good rut.
Then I remembered our local brewery, Round Guys Brewery. I went to pick up a half-growler and I asked for a suggestion. When they heard it was for steaming mussels the reply came with no hesitation, "Fat Bob’s Tripel XVII,”  a  Belgian-style beer made with 10% rye malt, Ardennes yeast and Saaz hops, into which I would swirl chipotle peppers for some smoke and some bite. All that would be needed is some crusty bread, a salad, and dinner is ready. 
For mussel dinner number two, I returned to a variation of the classic moules a la mariniere, with some pasta tossed in at the end.
Cultivated mussels are relatively clean but before you use them give them a thorough rinse in a bowl of cold water, moving them around in the water. Drain the mussels in a colander. If the mussels have any beards attached (the fibrous strings that stick out of the shells) trim them off with a knife. If any of the mussels are open, tap them against a flat surface. If the mussels are still alive, they will close: if they don’t close, discard them.
Now get in the kitchen.... and support your local brewer, if you have one.

This is what I did when my love was away.

Mussels Steamed in Beer and Chipotle Broth
This could also be made with clams, which my wife would definitely like.
I used about 22 mussels for one serving, so one bag, which holds about 4 dozen mussels, will easily serve two people.

¼ cup diced onion or minced shallot                                        

1 or 2 cloves garlic, minced
½ cup beer
1 or 2 chipotle peppers (to taste), chopped
1 teaspoon adobo sauce from the chipotle peppers
1 Tablespoon chopped cilantro
1 Tablespoon unsalted butter, optional
olive oil, for cooking

1. Place a medium-sized sauté pan over medium high heat. When hot, swirl in 2 tablespoons olive oil. Add the onion (or shallot) to the pan. Reduce heat and sweat the onion for 3 to 4 minutes until translucent. Add the garlic and cook until fragrant, about 30 seconds. Add the beer, the chipotles and the adobo to the pan and stir. Raise the heat to medium-high. Add the mussels, cover and steam until the mussels open, about 3 to 4 minutes. Swirl in the butter and serve.


Mussels in White Wine with Fettucine
The remaining two dozen mussels would have made dinner for two when paired with pasta. It will take longer for the pasta water to come to a boil and for the pasta to cook than it will take for the mussels to steam.
For two servings:

Two dozen mussels

6 ounces dry fettucine
2 strips bacon, optional
¼ cup minced shallot
1 to 2 cloves garlic, minced
hot pepper flakes, optional, to taste
½ teaspoon ground black pepper
To finish the mussels: either 1 Tablespoon extra virgin olive oil, 1 Tablespoon unsalted butter, or ¼ cup light cream.
1 Tablespoon chopped flat leaf parsley

1. Cook the bacon, if using, until crisp. Drain on paper towels and set aside.
2. Place a large pot of salted water over high heat. When the water comes to a boil, add the pasta and cook the fettucine for one minute less than suggested.
3. Place a large sauté pan over medium-high heat. When hot, add the shallots and sweat for a minute. Add the garlic and hot pepper flakes to the pan and cook until fragrant, about 30 seconds. Add the wine, black pepper, and the mussels. Cover the pan and steam the mussels until they open, about 3 to 4 minutes. Remove the opened mussels to a bowl, cover with a piece of foil, and keep warm.
4. When the pasta is ready, drain it into a colander. Put the fettucine into the pan of mussel broth. Finish to your choice by adding the olive oil, butter or cream to the pan and stir to combine. Crumble in the bacon. Cook the pasta in the sauce for an additional minute. Return the mussels to the pan and add the parsley. Divide the pasta, mussels, and sauce between two bowls and serve.


richie havens, 1941-2031, thank you.

Round Guys Brewery Co: http://roundguysbrewery.com/


*”With a Little Help From My Friends,” Lennon and McCartney


Tuesday, April 16, 2013

Jersey Blue


Jersey Blue: An occasional piece on cheeses


I owe my love of blue cheeses to my wife, which is just one of the many things she brought into my life and our relationship. At one time she worked in a cheese shop (“It’s not much of a cheese shop really, is it?”) and possessed a level of lactic sophistication far greater than mine. (Today such things might be listed on Craig’s List as “Former cheese monger seeks willing student…” You get the idea).  The delights in all things blue and moldy were passed on early. Youngest daughter discovered the joy of gorgonzola during dinner one night during a family trip to London when she was 7. (It was an Italian restaurant, so she had to learn about Stilton later). Sadly oldest daughter is lactose intolerant.
When youngest daughter was home recently for spring break we spent a day in Philadelphia, making a stop in that temple of cheesy comestibles, Di Bruno Brothers. Looking over the selections of blue cheeses we found Jersey Blue, a raw milk beauty from Switzerland. Distinctive with its marble-like veining of mold I figured that if looks were any indication, it should be wonderful. (A caveat here: it is expensive). We bought some, took it home, and I was curious to learn more about the cheese.
Jersey Blue is one of the cheeses made by Swiss cheese maker Willi Schmid. Often referred to a “the Cheese Wizard,” which was probably a title bestowed upon him by his importer, Quality Cheeses. There is a video of Schmid at a cheese tasting in NYC accompanied by the theme from the Harry Potter movies. I’m not making this up.
Trained in science (chemistry, microbiology, and physics), Schmid has been a dairy farmer since 2006. Four short years later, Jersey Blue won “World’s Best Jersey Cheese” in 2010, an annual award for cheeses made from Jersey cow milk.
Jersey Blue isn’t inoculated with mold like other blue cheeses. The unique veining is a result of hand ladling the curds into the cheese molds. The cheese is ready in about 9 to 10 weeks time, when the mold has developed throughout the cheese and appears on the outer surface. Slight differences in the color of the paste are seasonal. A white paste signifies that it was made during the winter. A pale yellow paste indicates that it was made from summer milk, the time of  year when the cows graze on fresh grass and flowers that colors the milk with beta-carotene. Schmid tastes the milk every morning to determine its proper use.
But all of this is meaningless unless it’s good.
And it is. Rich, buttery and creamy smooth with a nice blue acidic twang. (I’m no good at the “You taste hazelnuts and the terroir of the Lichtensteig meadows where the cows graze” business). We are slowly working our way through our slice of this marbled beauty. And don’t remove the rind since that is edible as well.
I know I usually don’t write about food without recipes. This is the best I can do for this post.  Slices of good crusty bread? Check. A knife for spreading the cheese onto the aforementioned bread? Check. Wine or beer? Check. Well then, you’re set.
 If you love blue cheeses and don’t pass out when you see the price, Jersey Blue is a beauty.

Quality Cheese:
http://www.google.com/search?client=safari&rls=en&q=quality+cheese&ie=UTF-8&oe=UTF-8

Malfadine with Swiss Chard, Blistered Tomatoes, and Fried Shiitakes


“Little darling, it’s been a long cold lonely winter.”*

Looking toward the arrival of spring
Listening: Chris Potter Quartet- Vertigo


I am, regrettably, behind in my postings. I had started this when there was a little bit of warmer weather several weeks ago, when spring seemed like a vague promise. It usually takes just one day of warmer weather to get everyone thinking that winter has loosened its chilly grasp and we are fooled that spring warmth might be right around the corner. My red haired food co-pilot works at a college and bears this out for me. If there’s one nice warm day, the coeds are wearing shorts and flipflops. But it doesn’t last. We know it’s too early but hey, isn’t there more daylight? That should count for something.

No matter what type of winter you had, it is officially spring.  Thanks to a slight warm up when youngest daughter was home for her spring break, I made dinner with ingredients that looked back to winter but with a spring-like lightness.
As you might know, I work in a restaurant. One of the menu items uses Swiss chard, leaves only, which means unused stems. One day when the chard was being prepped for steaming, I asked that the stems be saved. I would take them home and use them. The chard was cut from the stems leaving a little bit of the leaf behind. This would be used with pasta. I also roasted some grape tomatoes to bring out more sweetness and fried some shiitakes, which would be scatted over the finished pasta.
If you have never fried shiitakes, you should try it. The shitakes cook to a deep brown, intensifying in flavor that is almost bacon-like. (Almost. Bacon is bacon after all). It would work with some other mushrooms too. I had wanted to use maitakes but shiitakes were easier to find.
And what do you do if you don’t have any chard stems that you brought home from work?  Prepare your chard in a similar manner, saving the leaves for another meal and using the stems for this pasta.  I used a long, ribbon-like dry pasta made locally by Severino Pasta called mafaldine. I used to know Pete Severino when he delivered his family’s pasta to a restaurant in Philly where I worked. (That’s Pete holding fresh noodles in one of their web page photos). Severino pastas are available at Whole Foods. They also work in conjunction with Whole Foods, supplying them with their fresh pasta items.
You can substitute with any long pasta, such as fettucine.

Malfadine with Chard stems, Blistered Tomatoes, and Crispy Fried Shiitakes
Although this might seem like a lot of steps, the prep breakdown is as follows: you can fry the shiitakes while the tomatoes are roasting and you’re waiting for the pasta water to boil. Some of the cooking liquid with the chard stems becomes the basis of the sauce. Although you don’t use all of the tomatoes in this recipe, roast all of them and save the leftovers to toss into salad.

If you are using malfadine noodles, break them in half.

For two servings:
3 to 4 ounces malfadine (or other) dry pasta
2 cups(loosely packed)  Swiss chard stems, sliced into ½” pieces
1 pint grape tomatoes
6 to 8 shiitake mushrooms
1 Tablespoon minced garlic
salt and ground black pepper
extra virgin olive oil
2 Tablespoons grated Parmesan cheese
shaved ricotta salata, optional

1. To make the blistered tomatoes: Heat oven to 450 degrees. Rinse the cherry tomatoes under cold water. Toss the tomatoes with 2 tablespoons olive oil; season with salt and pepper. Place the tomatoes onto a baking tray lined with parchment paper or a silicon mat. Scatter a few sprigs of fresh thyme over the tomatoes (optional).  Roast the tomatoes for about 15 minutes, until they take on some color and have begun to split. Remove from oven and set aside.
2. To make the fried shiitakes, remove the stems from the shitakes and discard. Slice the caps into ¼ ” thick slices. Place a small sauté pan over medium heat. Add ¼” vegetable oil (such as canola) to the pan; when the oil is hot, add the shitakes in batches and fry until browned and crisp, about 4 to 5 minutes. If they appear to be cooking too quickly, lower the heat under the pan. Gently move the shiitakes around as they cook. When the shiitakes are done, transfer them to paper towels. Repeat until all of the shiitakes are cooked. After all the shiitakes have been fried and drained, transfer them to clean paper towels and set aside.
3.  Place a pot of salted water over high heat. Cover and bring to a boil and cook the pasta according to directions, cooking the pasta one minute less than suggested. Place a large sauté pan over medium high heat. Drizzle 2 to 3 tablespoons extra virgin olive oil into the pan. Add the garlic and cook until fragrant, about 30 seconds. Add the chard stems, season with salt and pepper and sauté for a minute. Add ½ cup of the pasta water to the pan. Cover and let the chard stems cook until tender, about 6 to 8 minutes. Add about half of the grape tomatoes (and their juices) to the Swiss chard. Set pan aside if the pasta hasn’t finished cooking.
3. Before draining the pasta, remove about ½ cup of the pasta water and set aside.  When the pasta is cooked, drain the pasta. Place the chard stems back over the medium heat. Add the pasta and mix the pasta into the vegetables. Add the grated parmesan cheese and toss to coat; if the sauce seems dry, add some of the pasta water to the pan. Remove the pan from the heat and divide the pasta between two bowls. Scatter the shiitakes between the two servings. Drizzle each portion with a little additional olive oil and shave some ricotta salata over the pasta. Serve.

*Here Comes the Sun" George Harrison

Severino Pasta: http://severinopasta.com/
Chris Potter: http://www.chrispottermusic.com/  or
 http://www.youtube.com/watch?v=1-wH_E4cM2Y


Wednesday, March 20, 2013

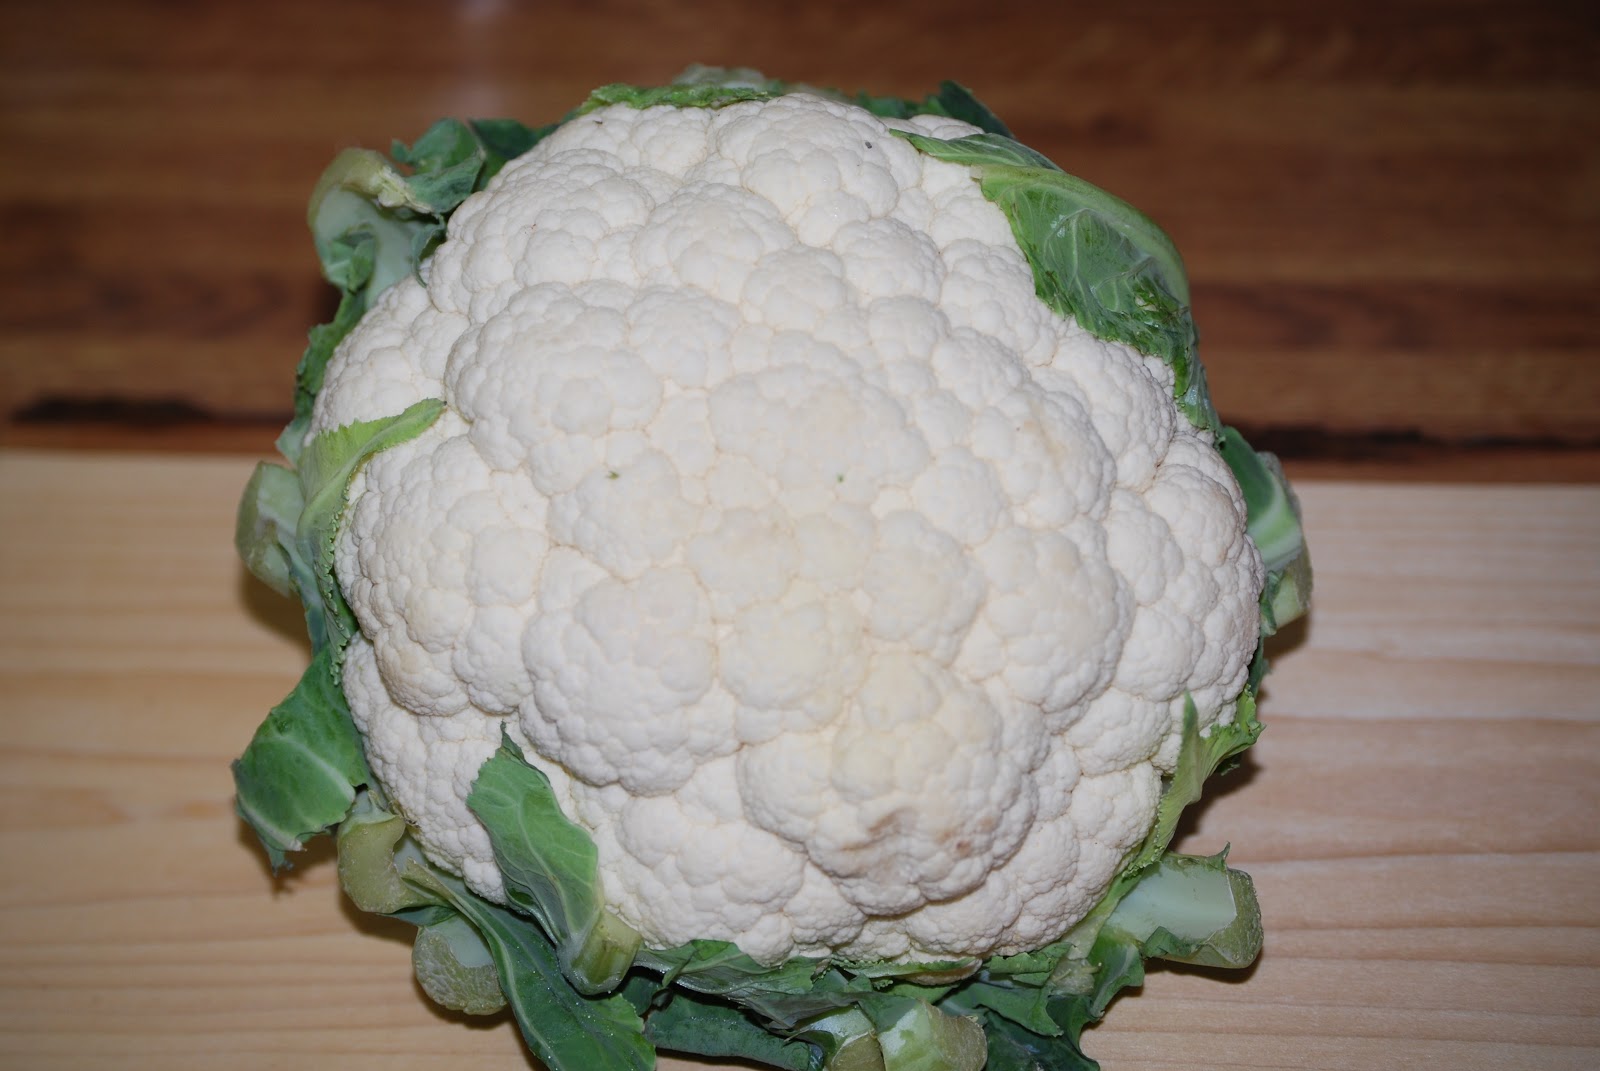
Cauliflower: The White Album


                  “The delicate white cauliflower flesh opened like enormous roses,
                        surrounded by large green leaves, so that the mounds resembled bridal
                                                bouquets on display at a flower stand..”*


Emile Zola, author of the above quote, was quick to discover the beauty of cauliflower. All these years later, we seem to be catching up. If you wait long enough, your time may come. It seems to be cauliflower's moment, the new “it” vegetable, even though it has always been there, waiting to be noticed again. It has been embraced with new enthusiasm and its adaptability finds it prepared in new ways, not just the old standby of smothering it with cheese sauce. While cauliflower may be getting edged out of the spotlight by kale, let’s give a vegetable its moment.
Along with the familiar white cauliflower, there is a variety with a Cheetos-orange hue (with 25 times the level of vitamin A found in the white variety) plus you can also find green and purple cauliflower.   Romanesco, a variant of green cauliflower, looks like a strange breeding experiment between a cauliflower and fractal geometry.


Cumin Roasted Cauliflower
For two servings

2 cups cauliflower florets
2 to 3 Tablespoons olive oil
1 teaspoon salt
½ teaspoon freshly ground black pepper
1to 2 teaspoon ground cumin

1. Heat oven to 425 degrees. Place the cauliflower into a bowl. Drizzle with olive oil. Sprinkle the salt, pepper and cumin over the cauliflower and mix until well combined. Line a baking pan with a piece of parchment paper or a silicon mat. Spread the cauliflower in an even layer and roast it in the oven for 20 to 25 minutes until tender, depending on the size of the florets; test it with the point of a knife. Remove from oven and serve.

I have also mixed the cumin roasted cauliflower into Greek tzatziki sauce and paired it with grilled meats and fish. 

Tzatziki with Cumin Roasted Cauliflower
For two servings

6 ounces plain Greek yogurt
½ cup peeled, grated cucumber
¼ cup diced red onion
I Tablespoon chopped fresh mint
Juice of ½ lemon
½ teaspoon salt and ¼ teaspoon freshly ground black pepper

1. Place the yogurt into a bowl. Add the remaining ingredients and stir together. Taste and adjust seasoning as needed. Fold in the cooled cumin-roasted cauliflower.


Cauliflower puree has become popular with chefs for the blank canvas it provides for a main dish. Very often it is paired with a white fish, such as scallops or Chilean sea bass, for a “white on white” effect.
While cauliflower puree may never replace mashed potatoes, this is pretty damn good. And simple.  While I use black pepper in the recipe (cue the “white pepper or black pepper” argument that Julia and Jacques used to have), you can use ground white pepper, too. Four cups of florets for two people may seem like a lot, but it purees down to enough for two.

                               Pan Roasted Salmon with Cauliflower Puree with Brown Butter

Cauliflower Puree with Brown Butter
For two servings

4 cups loosely packed cauliflower florets
2 Tablespoons light cream, optional
1 Tablespoon unsalted butter
salt and freshly ground black pepper

1. Fill a sauce pan with ½ cup lightly salted water. Cover and bring the water up to a boil. Add the cauliflower, cover, and simmer until tender, about 5 to 7 minutes.
2. Place the cooked cauliflower and the remaining cooking water (and the cream) into the bowl of a food processor and puree until smooth. Place the cauliflower puree into a saucepan. When you are ready to serve the puree, warm the puree over low heat. Place a small sauté pan over medium heat. Add the butter and melt the butter until it bubbles and turns a light brown color. Pour the brown butter into the cauliflower puree and whisk together. Taste for seasoning (it will probably need more salt due to the lack of salt in the butter) and adjust accordingly. Serve.

Cauliflower Gratin
This is for two servings. Figure about 1 cup florets per serving if you are scaling up the recipe.

2 cups cauliflower florets
1 teaspoon minced garlic
1 Tablespoon chopped onion
1 Tablespoon unsalted butter or olive oil
¾ cup light cream
½  teaspoon salt
¼  teaspoon ground black pepper
2 to 3 Tablespoons grated Parmesan or Romano cheese

1. Heat oven to 350 degrees. Butter a 3 to 4 cup baking dish. Place the florets into the dish. Place a small sauce pan over medium heat. When the pan is hot, add the butter or oil. Add the garlic and onion and cook for 2 minutes to soften the onion. Add the cream to the pan, along with the salt and pepper; mix together and heat until the cream begins to simmer. Pour the cream over the cauliflower. Cover the dish with a piece of aluminum foil, place the baking dish onto a baking tray and place the tray into the oven. Bake covered for 25 to 30 minutes. Remove the cauliflower from the oven, uncover, and sprinkle the cheese over the cauliflower. Place the cauliflower back into the oven and bake for an additional 15 to 20 minutes until the cauliflower is bubbling. Remove cauliflower from the oven and serve.


 *from The Belly of Paris (Ventre de Paris) by Emile Zola, translated by Mark Kurlansky.


Wednesday, February 27, 2013

A Couscous for the World Day of Prayer


                                               “I was a stranger and you welcomed me.”


World Day of Prayer is a worldwide ecumenical celebration held the first Friday in March. Each year a different country develops the worship service spotlighting issues that they find important. This year a committee of women from France worked together to create the service and they chose to spotlight the struggles of immigration and ways to welcome “the stranger.” Men, women, and children in more than 170 countries and regions will celebrate World Day of Prayer.
Following the service, there is always a reception featuring foods of the “host” country. With France’s multiethnic population in mind, my red-haired food co-pilot (also the local co-pilot of this year’s WDP celebration), suggested making a couscous in recognition of the Moroccan immigrant community in France.
This couscous is not traditionally Moroccan, rather one inspired by Moroccan cooking. It’s good alone or as an accompaniment similar to one you might find  in a Moroccan meal.
This recipe is scaled down to two servings but it can easily feed more by expanding the quantity of ingredients.


A Couscous for the World Day of Prayer
For two servings:
1/3 cup couscous
½ cup water
¼  teaspoon salt
1 teaspoon olive oil

Zest and segments from one navel orange
1 Tablespoon harissa (optional)*
1 Tablespoon extra virgin olive oil
8 oil-cured black olives, pitted and chopped
¼ cup diced red onion
¼ cup shelled pistachios, chopped
1 Tablespoon chopped cilantro
1 Tablespoon chopped flat leaf parsley
½ teaspoon salt
½ teaspoon ground black pepper

1. Place the water, salt and olive oil into a small saucepan. Place the saucepan over high heat and bring the water to a boil. Remove the pan from the heat, add the couscous, stir and cover the pot. Let the pan sit off the heat for 5 minutes until the water has been absorbed into the couscous.  Let cool.
2. Grate the zest from the orange and place it into a medium-sized mixing bowl. To segment the orange, cut the top and bottom from the orange. Slice the peel of the orange from the top to the bottom, exposing the flesh of the orange. Carefully cut the segments away from the pith; do this over the mixing bowl to capture any juice. Place the segments into a separate small bowl. Squeeze what remains of the orange into the mixing bowl.
3. Place the harissa and the olive oil into the bowl with the zest and juice and whisk to combine. Fluff the cooled couscous with a fork until it is broken up and add it to the mixing bowl. Stir to coat the couscous with the dressing. Add the remaining ingredients-the olives, onion, pistachios, and herbs- and mix to combine. Season the couscous with salt and ground black pepper. Cover and refrigerate until needed.
4. Before serving, remove the couscous from the refrigerator and let it come to room temperature. Cut the orange segments in half, crosswise, and mix them into the couscous. Taste and adjust seasoning before serving.


                                                          Seared Salmon and Couscous

* Harissa is a Moroccan condiment made from red bell pepper, garlic, olive oil, vinegar and chili pepper. If you cannot find it, it can be omitted.

Friday, February 8, 2013

A Gumbo for Mardi Gras


                                                “I’m going to make a chicken gumbo
                                                       Toss some sausage in the pot
                                                     I’m going to flavor it with okra
                                                   Cayenne pepper to make it hot…”*


A Gumbo for Mardi Gras
(listening: Wynton Marsalis Quartet: “Live at Blues Alley”, disc two

Is it a cliché to think of New Orleans at the beginning of Lent? They are, after all, known for the largest celebration in the country to usher in the beginning of the Easter season; a symbolic last night of excess before what is traditionally seen as a time of doing with less.
Gumbo, just one of the many foods synonymous with New Orleans, is a stew born out of the necessity to eat and using what was on hand. In her excellent book, “High on the Hog,” author/food historian Jessica Harris reveals that the roots of word “gumbo” can be traced to the Bantu language where okra, often a key gumbo component, is known as ochingombo or guingombo. Gumbo as we know it today has had a long journey with many hands stirring and seasoning the pot along the way.
That said, there is no okra in this recipe, unless you want to add it. I like okra, but not when its, shall we say, “gooey” qualities come out. This is only one approach to making a gumbo. If you’ve never made one, this one will get you started; from here you can stir the pot your own way.
I use andouille sausage, which is now easier to find outside of Louisiana, as well as chicken and shrimp. This recipe will easily feed six. Easily. Expand the recipe and you could feed a small gathering, which begs the question: why isn’t a gumbo made more often than the ubiquitous pot of chili that always seems to appear at social gatherings?
Well, no matter. We’re eating well with this, my friends.
Vegetarian friends can stir the pot in their own way. (This includes any of you who might be distantly related to Cajuns).  Perhaps it could use  vegetarian-friendly “sausage” with plenty of vegetables and spices.
Should gumbo not be your Fat Tuesday choice, locally we celebrate “Fastnacht” Day ("what-what day?"). Fastnacht, or “Fast Night” is the Pennsylvania German tradition of feasting the night before Lent begins and here it is symbolically represented with special doughnuts called fastnachts.  I look at it as a win-win situation.

And always serve gumbo with rice.


This gumbo, like many others, begins with a roux; it can be made in advance and refrigerated until needed.  (Even that “Bam” guy says making roux ahead of time is fine).

Roux
6 Tablespoons vegetable oil, such as canola                                  
6 Tablespoons flour

1. Place a saucepan over medium heat. Add the oil and whisk in the flour.
 Cook the roux for 15 to 20 minutes, watching and adjusting the temperature so that the roux slowly browns to a chocolate color. Whisk throughout.
You’ll be able to notice the color changes as well as smell the differences; first there will be the smell of raw flour, replaced by
 a more toasted smell. Think popcorn.
Remove the finished roux from heat and continue whisking; the roux will continue to cook off the heat; you might be surprised how much darker it will get as it sits off of the heat. Store the cooled roux in a covered container in the refrigerator if not using it right away. The roux will keep for several weeks.


Gumbo

1 large onion, diced
1 red or green bell pepper, diced
2 ribs celery, diced
2 to 3 cloves garlic, chopped
6 ounces andouille sausage, sliced
One 28 ounce can whole tomatoes, crushed by hand
1 cup water
1 ½ cups chicken broth or water
About 12 fresh thyme sprigs, tied with string
2 or 3 bay leaves
¼ cup chopped flat leaf parsley
½ cup roux
about 1 pound chicken, white or dark meat, diced
½ pound shrimp, peeled and deveined
olive oil, for cooking
salt and freshly ground black pepper

1. Place a large Dutch oven (4 quart size) over medium heat. Swirl in 2 to 3 tablespoons olive oil. Add the onion, pepper, and celery to the pot, stir, and season lightly with salt. Reduce the heat and cover to sweat the vegetables for about 5 minutes.
2. Uncover the pot, raise the heat, add the garlic and cook until fragrant, about 30 seconds.
3. Add the andouille sausage and stir. Cook for another 4 to 5 minutes to release the flavors of the sausage.
4. Add the crushed tomatoes to the pot; rinse out the can with 1 cup water, adding it to the pot.. Add the additional chicken broth or water; season with some salt, about a teaspoon, and ground black pepper. You can also add some red chili flakes or cayenne pepper if you want your gumbo spicy; this all depends on the spiciness of the sausage. Add the thyme, bay leaves, and chopped parsley.
5. Stir in ½ cup of the prepared roux until evenly incorporated.
6. Add the chicken. Raise the heat until the gumbo begins to simmer. Adjust the heat so that the gumbo simmers gently, for about an hour to an hour and a half. Stir occasionally during cooking.
7. Before serving, taste for seasoning and adjust if necessary. Add the shrimp to the gumbo and cook for a final five minutes. Remove the bay leaves before serving.


* from “So Beautiful or So What,”  lyrics by Paul Simon