Wednesday, March 26, 2014

Farro


Listening: John Renbourn: Faro Annie*

“Our chefs have tended to steal the show, which I guess is the nature of good chefs.”- John Renbourn

In our restless pursuit of the new or the next, we often rediscover something old. Farro is one such rediscovery. Farro is an ancient grain that has been around long enough to be found in the tombs of the Egyptian kings.
There is some confusion surrounding the exact variety of wheat that should be called farro. Common to Italy is emmer wheat, what some call “true farro.” The Germans and Swiss grow spelt and the French have epeautre.  All of these varieties belong to the genus triticum (triticum aestivum is “common” wheat) but the three are different varieties hence all of the confusion.
Most important though is to buy farro that’s labeled as either pearled or semi-pearled, a milling process that cuts the cooking time; if the package says that cooking time is 25 to 30 minutes, that’s what you want.
Whenever I make something like this or rice for example, I always make enough for four servings and put the rest away in the refrigerator to use later.

Basic Farro
For four servings
2 cups lightly salted cold water
1 cup of farro
1. Place the water into a medium-sized saucepan and bring it to a boil over high heat. Add the farro, stir, cover, and reduce the heat to a simmer. Cook the farro for 25 to 30 minutes. Taste the farro. It should  be chewy, like an al dente risotto but it shouldn’t have any “crunch;” if it does, continue to cook the farro. Remove the farro from the heat and drain into a colander.


Pan Roasted Fish with Kale and Farro with Blood Orange Sauce
For two servings

I used salmon, which is readily available but any firm fleshed fish would work. Pacific halibut, which is coming into season, would work well too.

Two 4 to 6 ounce portions of salmon fillet
1 cup cooked farro
4 ounces of kale (I used black kale, also called Tuscan kale, or lacinato kale)
¼ cup minced shallot or onion
1 to 2 cloves garlic, minced
salt and ground black pepper
olive oil, for cooking

1. Remove the stems from the kale and discard. Chop the kale into small pieces and set aside.
2. Place a large sauté pan onto the stove over medium- high heat. When hot, drizzle in about 2 to 3 tablespoons
olive oil. Add the shallot and cook until softened, about 2- 3 minutes. Don’t let the shallots brown; lower the heat if necessary. Add the garlic and cook for 30 seconds, until fragrant. Add the chopped kale and about ½ cup water to the pan; season with salt and ground black pepper. Cover and let the kale soften, about 5 to 6 minutes. Add extra water if necessary. Taste the kale as it cooks; it should be tender to the bite. Stir 1 cup cooked farro into the cooked kale. Add additional olive oil if the farro/ kale mixture appears dry. Remove from heat and cover and set aside.
3. Prepare the orange sauce:

Blood Orange Sauce
2 blood oranges, juiced and strained (any orange will work, too)
1 Tablespoon cold, unsalted butter

1. Place the orange juice into a small saucepan. Place over medium-high heat and reduce the juice by ½  to 2/3. Remove pan from heat and cook the fish.
2. Place a sauté pan over high heat. Swirl in a tablespoon of olive oil into the pan. Season the fish with salt and ground black pepper. Place the fish skin side up into the pan and cook the fish for 3 to 4 minutes (cooking time is about 10 minutes total cooking time for well done for 1” of thickness). Turn the fish and continue cooking to for an additional 4 to 5 minutes or to your preferred degree of doneness. Remove the fish from the pan and drain any excess oil on a plate lined with paper towels. (If the fish has skin, can be carefully removed before serving).
3. Before serving return the saucepan with the reduced orange juice to low heat. Whisk in the tablespoon butter.
4. To serve, divide the farro/kale mixture between two plates. Top with a piece of fish and spoon the blood orange sauce over each portion.

“Now that I’ve made extra farro, how can I use it?” Glad you asked.
Farro in Risotto Style

You can use whatever vegetables you have on hand. This is what I had. Feel free to improvise. Farro isn’t as starchy as Arborio rice so I added a little light cream for the creamy texture of risotto.


1 cup cooked farro
4 ounces of kale (leftover from the pervious recipe)
¼ cup minced onion
1 to 2 cloves, minced
4 ounces crimini mushrooms, cleaned and sliced
1 cup grape tomatoes
1 cup diced butternut squash
6 to 8 sprigs fresh thyme
salt and ground black pepper
olive oil, for cooking
¼ cup vegetable or chicken broth
2 Tablespoons grated Parmesan cheese (you can always use more)
1 Tablespoon unsalted butter
2 Tablespoons light cream
1. Prepare the kale as in the previous recipe. Set aside when tender.
2. Heat oven to 425 degrees. Line a baking tray with a sheet of parchment paper. Mix the mushrooms, tomatoes, and butternut squash with 2 to 3 tablespoons olive oil; season the vegetables with salt and ground black pepper. Spread the vegetables onto the tray in one layer. Toss the thyme into the vegetables. Roast the vegetables for 20 minutes; remove from the oven and turn the vegetables over. Return the vegetables to the oven and roast for an additional 8 to 10 minutes until vegetables are tender. Remove the vegetables from the oven.
3. Place the pan with the kale back over medium heat. Add the cooked farro to the pan. Stir in the vegetable stock. Remove the thyme sprigs from the roasted vegetables then add the roasted vegetables, Parmesan cheese, butter, and cream to the farro  Stir until everything comes together. Divide between two bowls and serve.

*Faro Annie was John Renbourn’s last album for the Transatlantic label, the label that, in his words, “had pretty much picked me up off the street and given me a start.”


Tuesday, February 25, 2014

Baking 101-Banana Bread


Listening: Adam Rogers: “Allegory”

“Dad? Where’s the banana bread recipe?”
“I have it with me at work.”
“I wanted to make some today and I couldn’t find it when I looked for it.”

Wasn’t I supposed to be putting recipes here for my daughters?
No better time to kick off  “Baking 101 “

This first recipe, for banana bread, is as simple as it gets. It’s referred to as a “quick” bread which means it doesn’t use yeast and require a rising time so making it, therefore, is “quick.” It can be made with a mixer or by hand. The hardest part of the recipe is mashing the bananas. The recipe uses bananas that have over-ripened and turned brown and are too soft to eat although it can be made with any ripe banana. And don’t worry about the size of the bananas; it will work.
This recipe is my response to the many people who claim that they “can’t bake.”
You can add 1 cup chocolate chips or 1 cup walnuts, or ½ pint blueberries.  It’s great toasted for breakfast or turn it into French toast
Easy. Simple. Enjoy. (This one’s for you, Roo.)

Banana Bread
For one loaf 9”x5”x3”                                                      


2 ripe bananas
¾ cup sugar
4  Grade A large eggs
6 Tablespoons water
6 Tablespoons vegetable oil (such as canola)
1 teaspoon salt
1 teaspoon vanilla extract
2 cups all-purpose flour
1 Tablespoon baking powder

1. Heat oven to 350 degrees. If the pan is not a non-stick pan, lightly butter the bottom and sides of the pan or spray with cooking spray. (You could also line the bottom and sides of the baking pan with a piece of parchment paper but this is optional).
2. Peel the bananas and place them into a bowl. Add the sugar and mix until the mixture is smooth. It’s fine if there are small lumps of banana. Mix in the eggs, one at a time until blended. Add the water, oil, salt, and vanilla, mixing until incorporated. Add the flour and baking powder; stir until the batter is smooth. Lastly mix in the chocolate chips, walnuts, or blueberries if using. If you are using chocolate chips or blueberries, toss them in a little bit of flour before adding them to the batter. It will prevent them from sinking to the bottom of the loaf.
3. Pour the mixture into the prepared pan. Place pan into the oven and bake for 50 to 55 minutes. A toothpick inserted into the center of the banana bread should come out clean; if not bake for several minutes longer. Remove banana bread from oven and let cool before removing it from the pan. Slice, savor, and bask in your accomplishment.


The jazz world seems to be awash with spectacular younger players and Rogers is one such player. A student of jazz as well as classical guitar, he’s a polished technician of dancing, skittering post bop melodies. As well as leading his own sessions he has appeared on over 200 recordings.
                                            http://www.adamrogersmusic.com/


Monday, February 10, 2014

A Menu For Valentine's Day


                            Salmon with Pomegranate Butter Sauce and Couscous
                                       Chocolate & Earl Grey Pots de Crème


(Listening: Aaron Parks: ”Arborescence”)

In a restaurant Valentine’s Day is one of the nights often called “amateur night," referring to the large increase in customers with less dining experience and more demands. The term was first used on occasions when there would be a greater number of people getting unpleasantly drunk (think New Year's Eve, St. Patrick's Day, etc.). It has gone on to refer to any overcrowded, often unpleasant night in a restaurant.
Save yourself the hassles and dine in. This is an easy and approachable menu. Things can be made in advance, leaving just the final cooking.
Besides, everyone loves it when one’s significant other can cook.
The pots de crème need to be made ahead of time so that they can chill thoroughly, so making it one to two days before you need it cuts down on last minute work.
The pomegranate sauce is a variation of the classic beurre blanc, substituting pomegranate juice for wine: reduce the juice, swirl in a little butter at the end and it’s ready. It pairs beautifully with salmon. Couscous is an effortless accompaniment.
This menu will make you look like a pro. Make dessert first, one or two days ahead.

Chocolate & Earl Grey Pot de Crème     
The flavor of Earl Grey tea (which comes from bergamot, a variety of orange) pairs beautifully with chocolate. This recipe can’t be  “scaled down” to two serving. This will make three 4- ounce servings. Use any ovenproof  ramekins or dishes to hold the custard.

1 cup half and half
One Earl Grey tea bag
3 Egg yolks (Grade A large eggs)
2 Tablespoons Sugar
¼ teaspoon vanilla extract
2 ounces bittersweet chocolate (58% or higher), chopped

1. Heat oven to 300 degrees.
2. Place the half & half into a small saucepan. Place the pan over medium heat; warm until the half & half begins to simmer. Add the tea bag, remove from the heat and let steep for 10 to 15 minutes. Strain the half & half into a bowl through a fine strainer; press the tea bag to extract as much tea flavor. Remove and discard the tea bag. Measure the half & half making sure there is one cup remaining; if not add additional half and half to make one cup. Return the half & half to the saucepan.
3. Add the egg yolks to a bowl and whisk in the sugar and vanilla until dissolved. Set aside. Reheat the half & half until it begins to simmer. Remove pan from heat and whisk a few tablespoons of the hot liquid into the egg mixture (this is referred to as tempering the egg yolks). Pour the egg yolk mixture back into the saucepan. Place the pan over medium heat and cook the custard mixture; use a silicone spatula to stir. As you stir press the spatula on the bottom of the pan. Adjust the heat as needed. The custard is cooked when there is no light colored foam on top of the mixture and the custard is a uniform color; it will read at least 168 degrees on an instant-read thermometer. Strain the cooked custard into a bowl through a fine strainer; this should help remove any bits of cooked egg that might be in the custard (don’t worry, this happens to everyone.) Add the chopped chocolate to the hot custard mixture and stir until the chocolate has melted.
4. Divide the custard mixture between the individual ramekins or baking dishes. Place the dishes into a larger baking pan. Pour hot water into the pan around the dishes; the water should come up halfway outside the ramekins. Carefully place the pan into the oven and bake the custards for 40 to 45 minutes, until the custard had set. Remove from oven. Let cool before removing the ramekins from the water bath. Chill thoroughly before serving.

Pan Seared Salmon with Pomegranate Butter Sauce
  with Pistachio and Pomegranate Couscous
The couscous can be make while the salmon is cooking or made right before you cook the salmon. The basic rule for cooking any fish is 10 minutes cooking time for every 1” of thickness for well done. If you like your salmon more on the rare side, reduce the cooking time.

Pistachio & Pomegranate Couscous
You can omit the pistachios or the pomegranate seeds. To remove the seeds from a pomegranate, cut a ripe pomegranate in half, "across the equator" of the pomegranate. Hold the pomegranate cut side down in you hand. Tap the pomegranate with a wooden spoon. The seeds should drop out into your hand.
For two servings:
2/3 cup couscous
¾ cup water
1/4 teaspoon salt
2 teaspoons olive oil
1 Tablespoon pomegranate seeds
1 Tablespoon chopped pistachios
1. Place the water, salt and olive oil into a small saucepan. Place pan over high heat and bring to a boil. Add the couscous and stir. Remove from heat, cover and let stand until all of the liquid has been absorbed, about 5 minutes. Before serving fluff the couscous with a fork to separate the individual grains. Add the pistachios and pomegranate seeds and stir to combine.

Pan Seared Salmon with Pomegranate Butter Sauce
For two servings:
Two 4 to 6 ounce Salmon fillets
Salt and ground black pepper
Olive oil, for cooking
½ cup pomegranate juice
1 teaspoon honey
1 teaspoon minced shallot
1 Tablespoon and 1 teaspoon unsalted butter

1. For the sauce, place a small saucepan over medium heat. Add the butter. When the butter has melted, add the shallot, cooking to soften the shallot, about 1 to 2 minutes. Do not brown. Off heat, add the pomegranate juice and honey to the pan; stir to combine the juice with the honey. Place the pan over medium-high heat and cook until the mixture is reduced to about 3 Tablespoons. Remove from heat and reserve.
2. Place a non-stick pan over high heat. Pat the salmon fillets dry with a paper towel. Season the salmon with salt and black pepper. When the pan is hot, drizzle a tablespoon of olive oil into the pan. Place the salmon skin side up into the pan. Cook the salmon until golden brown, then turn the salmon over and continue cooking to your preferred degree of doneness (see note above). Remove the salmon to a paper towel lined plate; cover and keep warm.
3. Warm the couscous over low heat. To finish the sauce, return the pomegranate juice reduction to the stove and warm. Swirl/whisk in the tablespoon of butter until the sauce is glossy. Remove from heat.
4. Plate the salmon and the couscous. Spoon the pomegranate sauce over the salmon and serve. Pour some wine, light some candles. Serve the pots de crème for dessert. Honey, disconnect the phone.


Wednesday, January 29, 2014

A Return to Normal: Chicken "Hunter Style"


                 “Winter was cold and the clothing was thin.”*

A day off and a snowy one at that. A day that’s perfect for low and slow.
It’s a return to normal. Well, almost.
The long silence on my part was due to the demands of the holiday season, which for me means longer days with few days off as we make our way through the upswing in business at the restaurant where I work.
It is a crazy business. We’re working when others are readying for holidays. It leaves little time for other things. You have to love this life.
But then this chaos is, as the Buddha said, only transitory.
You have to love what you do.
So as I return to a normal schedule, my red haired food co-pilot enters her brief, chaotic time.
But hers, too, is transitory.
I need dinners that youngest daughter and I can have together and will only need reheating when my wife returns home late.  I have some short ribs cooking in the oven and a pot of chicken done “hunter-style” on top of the stove.
Italians would call this “cacciatore.” The French would call it “chasseur.” Both refer to “hunter” and it was, allegedly, a style of cooking common to hunters (or their wives) although I doubt that hunters ever went after chickens, unless of course they had no luck in the field. Both versions share a similarity of ingredients.

I used a 5 pound whole chicken that I cut into pieces. Lacking butchering skills, you can buy a cut up chicken or use whatever parts you like (all thighs or all legs or all breasts). Leave the bones in the chicken; you will be able to remove them after the chicken is finished cooking.  The object is to slowly braise the chicken until the meat falls off the bone when it’s done.
This can be cooked on top of the stove or in a low (275 degree) oven.
Some recipes call for dusting the chicken lightly with flour before browning it. This one doesn't. It's your choice.

Chicken "Hunter Style"
This recipe makes about 6 servings

One 5 pound whole chicken ( or equivalent  parts of your choosing)
2 cups sliced onion
1 red bell pepper, sliced (about 2 cups)
1 to 2 Tablespoons chopped garlic
8 ounces Crimini mushrooms, halved or quartered lengthwise, depending on their size
2 Tablespoons tomato paste
One 28 ounce can whole plum tomatoes, crushed (you can use canned crushed tomatoes)
2 to 3 bay leaves
8 to 10 sprigs of fresh thyme
3 to 4 sprigs of fresh rosemary
¼ cup chopped fresh basil, added right before serving
olive oil, for cooking
salt and freshly ground black pepper
½ cup red or white wine

1. If you are going to use the oven, heat oven to 275. Place a 4-quart Dutch oven (or similar oven-proof pot) on the stove over high heat. Pat the chicken dry with paper towels. Season the chicken with salt and ground black pepper. Swirl 3 to 4 tablespoons olive oil into the pot. Lay the chicken into the pot to brown; depending on the size of your pot you may have to cook the chicken in batches.  Turn the chicken until it has browned on all sides then remove the chicken to a plate.
2. When all of the chicken has been browned, remove the pot from the heat to cool slightly before adding the vegetables. Pour out some of the oil from the pot, reserving it to use as you cook. Place the pot back over medium-high heat. Add the onions and peppers to the pot; if the vegetables appear dry, add some of the oil back into the pot. Stir and let the vegetables cook to soften. Scrape and loosen any browned bits that may have collected on the bottom of the pan. After about 5 minutes when the onions and peppers have softened, add the mushrooms and season with some salt and ground black pepper. Stir together and continue cooking until the mushrooms begin to brown. Add the tomato paste and stir it into the vegetables; let the tomato paste brown for a minute or so.. Tie the thyme and rosemary together with a piece of string and add it to the pot along with the bay leaves. Add the crushed tomatoes and wine; stir everything together. Cook for an additional 2 to 3 minutes, allowing the alcohol to cook off. Return the chicken pieces to the pot, nestling them in the vegetables. Bring the liquid to a simmer, cover, and reduce the heat. Place the pot either into the oven and or continue to cook it top of the stove at a gentle simmer. Cook until the chicken is falling off the bones, about an hour or so. Stir in the shredded basil before serving. Taste and adjust the seasoning. You can remove the skin and bones if you desire.
As for any leftovers, store them covered in the refrigerator. Remove the chicken from the bones, shred it, and reheat it in the sauce. Mix it with your favorite pasta.

*"A Very Cellular Song," by the Incredible String Band. Lyrics by Mike Heron.
I remember quite well, I remember quite well.

Wednesday, November 20, 2013

Cherry & Cranberry Tart with Almond Crumble


(Listening: John Abercrombie Quartet: 39 Steps)*

Every pie or tart begins with the crust which for many can be intimidating, what with all of the warnings that go with making the crust—"Don’t overwork the dough, don’t add too much water, make sure you use enough water, roll the dough in one direction...."
Relax!
For tarts, I use pate sablee, which is essentially a cookie-style dough which is hard to mess up. It can be re-rolled and patched more easily than traditional pie dough. Unfortunately, you can only use it for tarts.
Pate brisee, which is what the French call our traditional-style crust  dough does take a little practice. I have found that if you make a double batch (a two crust recipe), the water necessary (3/4 cup) works out more easily than the tablespoon approach for one crust. Divide the dough and freeze what you don’t use. (Crust dough recipes and tips can be found in previous posts).
And this leads to the shortening vs. butter argument. I always use shortening. It makes for a flakier crust. Truthfully, the flakiest crusts are made with lard, the mention of which sends people running for cover. But lard is lower in saturated fat than butter so for occasional use, especially when flakiness is sought, lard could be your shortening of choice. (One of my nephews used to laugh uncontrollably at the mention of the word "lard." Kids!).
You could also use a combination of butter and shortening.
Then there’s the argument about the trans fats in vegetable shortening.
But I didn’t come here for an argument. I came to make this week’s pie/tart.
In the summer, when sour cherries were available at the farmer’s market I froze some and suggested you could do the same and said I would return with a recipe. It’s that time.
This is a recipe suitable for the upcoming Thanksgiving holiday. Not quite traditional but it does include that seasonal staple, cranberries.

The filling is cooked separately then spooned into the crust. Cherries give off a lot of juice and by thickening the fruit before you bake the tart assures that your filling shouldn’t run when the tart is cut.

Remember what I learned years ago: Even if you make a mistake, there will always be plenty of people to eat what you have made.

Cherry and Cranberry Tart with Almond Crumb
You will need one recipe pate sablee for a 10” tart. This can also be made as a 9” pie.

6 ounces cranberries (almost 2 cups)
½ cup sugar
½ cup water
2 cups (pitted) sour cherries
1/3 cup sugar
2 Tablespoons cornstarch
¼ cup water
1. Remove the pate sablee from the refrigerator and let soften. Knead the dough lightly on a lightly floured surface until smooth. Roll the dough out to an  1/8th inch thickness. Fit the dough into a 10” tart
pan, trimming the excess dough from the edge of the tart pan. Using a fork, lightly prick the bottom and sides of the dough. Refrigerate the tart shell for 15 to 20 minutes.
2. Heat the oven to 350 degrees. When the tart dough has chilled, remove it from the refrigerator. Place the tart pan onto a baking pan. Line the tart shell with a piece of aluminum foil and fill it with dried beans/rice/or pie weights. Place the pan into the oven and bake for 15 minutes; after 15 minutes remove the pan from the oven. Carefully remove the foil with the pie weights. Return the empty tart pan to the oven and bake for a final 5 minutes. Remove from the oven and let cool.
3. While the tart shell is baking, prepare the filling. Rinse and pick over the cranberries; discard any that may be soft or bruised. Place the cherries into a bowl, add the sugar and stir.
4. Place the cranberries, sugar, and water into a large sauté pan. Place the pan over medium heat and cook the cranberries until they pop, stirring as they cook. When the cranberries have cooked (about 4 to 5 minutes) add the cherries and their juice. In a small bowl, mix together the cornstarch and the water. When the fruit begins to boil, stir in the cornstarch mixture and cook the fruit until it comes to a boil and thickens. Remove from the heat and let cool.
5. Prepare the almond crumble topping:

Almond Crumble
4 ounces (1 cup) slivered almonds
1 cup all purpose flour
¼ cup sugar
¼ cup brown sugar
1 teaspoon salt
4 ounces (1 stick) unsalted butter, at room temperature, cut into pieces

To prepare the crumble topping, place the almonds into a food processor and pulse them until finely ground. (You could also use already ground almonds).
Remove the ground almonds from the food processor and place them into a bowl of a stand mixer. Add the flour, sugars, and salt to the almonds and using the paddle attachment, mix to combine. Add the butter into the flour mixture and mix until small crumbs form. (This can also be done by hand using a fork or a pastry cutter). Set completed almond crumble mixture aside.

Assembling the tart

Keeping the tart shell on the baking tray, spoon the completed filling into the tart shell with a slotted
spoon: you may not need all of the fruit juices. Cover the top of the tart with the crumble mixture; there may be about ¼ cup of the crumb mixture leftover.
Place the tart into a 350 degree oven and bake for 25 to 28 minutes, until the topping is golden brown. Remove tart from the oven and let cool before serving. Wait for the pie night revellers to arrive then slice and serve.

Could this be the start of a new holiday tradition?

And watch for pits! Sorry guys.


* The first Abercombie quartet, which also featured pianist Richie Beirach, recorded three albums between 1979 and 1981 and was one of my favorite groups at the time. The "piano quartet" has reformed with Marc Copland on piano (Since 2000, Beirach has been teaching at the Leipzig conservatory "Felix Mendelssohn-Bartholdy"). Here is a moment from a recent performance:
http://www.youtube.com/watch?v=ugVqMD_FQE4

Wednesday, November 6, 2013

Sour Cream Apple Tart with Walnut Crumble


Listening: Gretchen Parlato: Live in NYC*

If you are a reader of these dispatches sent out over the world wild web, you might know of our weekly pie night which gives us a chance to connect with friends and relax over pie.
My wife, the red-haired food co-pilot, recently took on a new position which has had her working crazy hours; we still reconnect over dinner, whatever time that might be, but we’ve had to skip a few pie nights. This week she had an obligation so pie night went on the road. She needed “something” for a reception, so as the ace up her sleeve I settled on this.
Much of the prep- the pate sablee, the assembly of the tart shell, the walnut crumble, even the precooking of the apples can be done in advance leaving only the final assembly and baking.
I used some Macoun apples I picked up at the last day of one of our farmers markets and mixed them with some Fuji apples. Use whichever apple you like.

Sour Cream Apple Tart with Walnut Crumble
You will need one recipe of pate sablee for a 10” tart

For one 10" tart:      
1 ¾ pounds apples, peeled and cut into ½” slices
2 Tablespoons sugar
1 cup (fresh) apple cider
1 cup sour cream
1 teaspoon sugar
1 teaspoon vanilla extract
2  Grade A large Eggs


1. Place the apple slices into a bowl, add the sugar and mix; set aside.
2. Place a sauté pan large enough to hold the apple slices onto the stove. Pour the apple cider into the
pan, turn the heat to medium-high and bring the cider to a simmer. When the cider is hot, add the apple slices to the pan. Poach the apples until they are just tender; the point of a knife should just pierce the flesh of the apple. Remove the pan from the heat, drain the apples and set them aside to cool.
3. While the apples are cooling, roll out the pate sablee to 1/8th inch thickness and fit it into a 10” tart pan. Using a fork, lightly prick the bottom of the tart. Refrigerate or freeze the tart until ready to bake.
4. Heat oven to 350 degrees. Remove the tart shell from the refrigerator or freezer. Fit a piece of aluminum foil into the pan to cover the dough. Fill the foil with dry beans, rice or pie weights. Place the tart pan onto a baking tray and bake the tart shell for 15 minutes; after 15 minutes remove the tart from the oven; remove the foil with the beans/rice/pie weights and return the tart shell to the oven to bake for another 5 minutes. Remove the partially baked tart shell from the oven; set aside and let cool.
5. In a medium-sized mixing bowl, place the sour cream, sugar, vanilla, and eggs. Whisk together until smooth; set aside. Layer the apples into the tart pan. Pour the sour cream custard over the apples; use a spatula to spread the custard over the apples. Lightly sprinkle the crumble mixture over the top of the tart. Place the tart into the oven and bake for 30 minutes, until the custard is set. Remove tart from oven. When the tart is cool, send it off with your wife. Wait for her to return with your reward of some leftover Nanaimo bars. That’s fair enough.


Walnut Crumble
This recipe makes more crumble than you will need. It’s really a light sprinkle of crumb over the sour cream not meant to cover the tart entirely. You can freeze the leftover crumb mixture and use it for another tart.
1 cup all-purpose flour
¼ cup brown sugar
¼ cup granulated sugar
1 cup chopped walnuts
1 teaspoon salt
½ teaspoon ground cinnamon
6 Tablespoons unsalted butter, at room temperature, cut into pieces

1. Place all of the dry ingredients into the bowl of a stand mixer and using the paddle attachment, mix them together. Add the butter and mix until small crumbs form. (This can also be done by hand). Remove and use. Leftover can be stored in a sealable plastic bag.


* Last fall my wife and I along with two friends were lucky to catch Gretchen Parlato at the Philadelphia Museum of Art. At that time, she was touring so extensively I wondered when she would find time to record her next album. It turned out that a live recording was planned for the upcoming weeks, now released and titled “Live in NYC.” 

                                                     http://www.gretchenparlato.com/

Friday, October 25, 2013

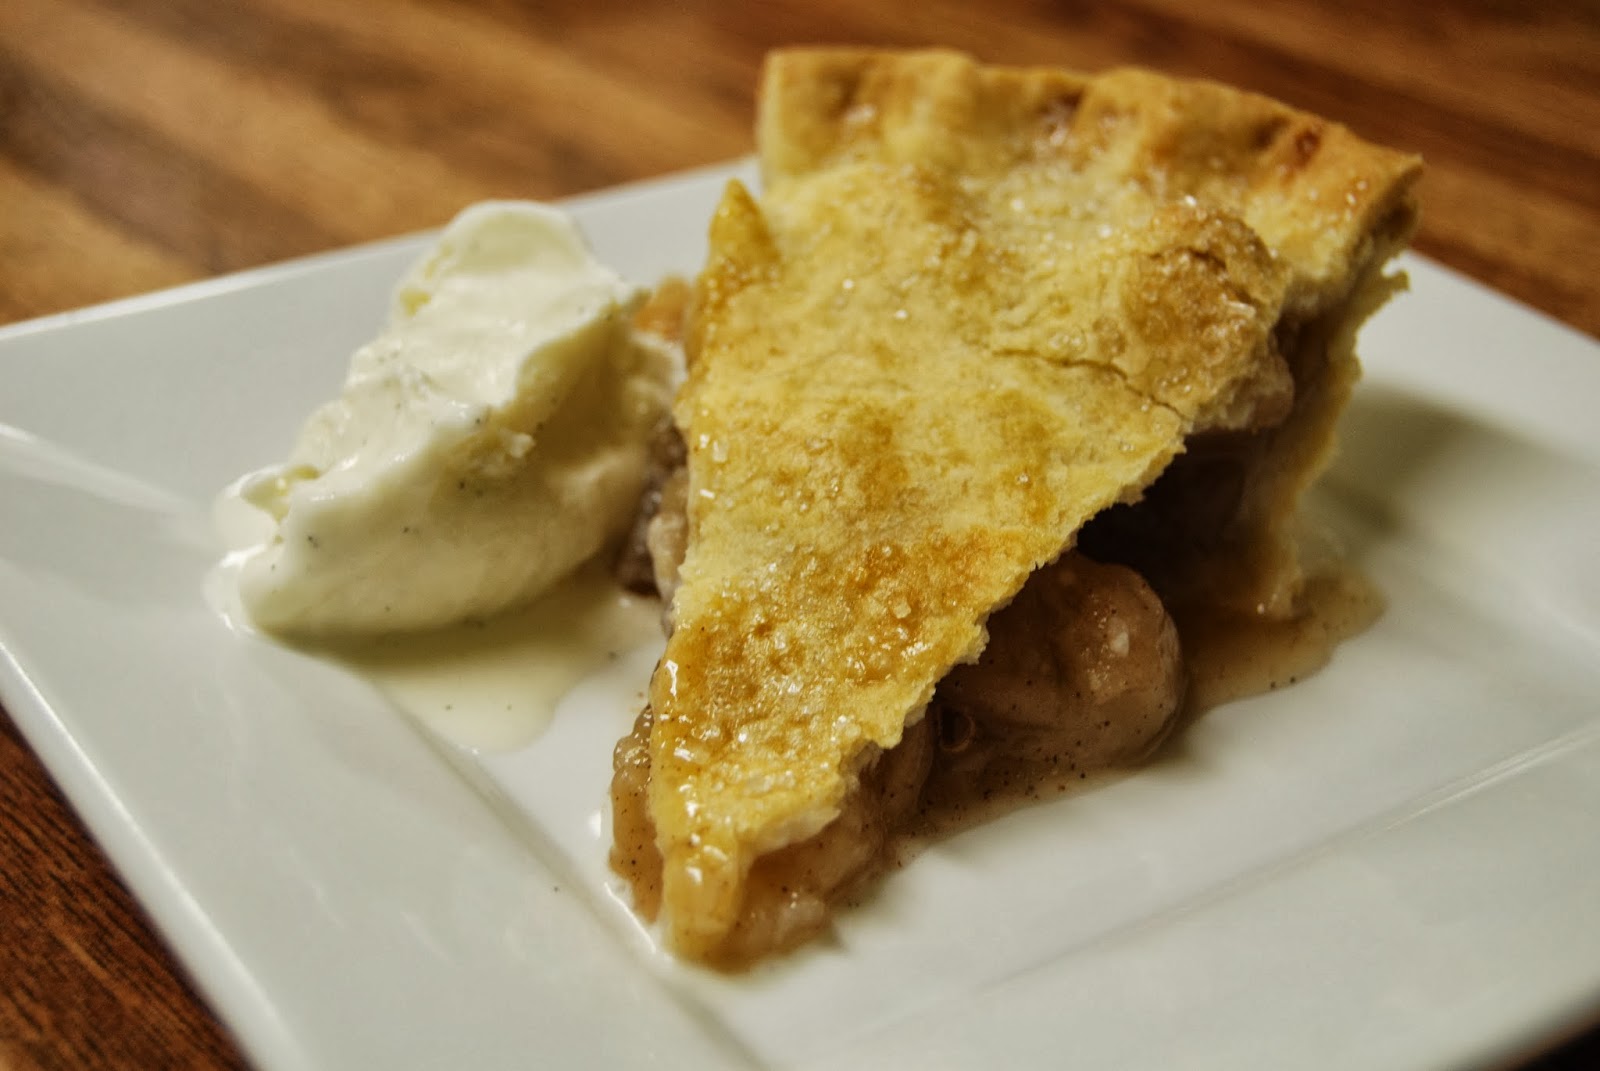
Sous le Pommiers: Apple Pie with Cinnamon. Cider, and Maple


Everyone has his or her favorite apple. My wife, the red-haired food co-pilot, is partial to Granny Smith for their tartness. The young woman behind the cash register at the farmer’s market said she was “obsessed with Honey Crisp apples.” At another market a customer was waiting for her Jonathan apple fix.
I am more of an applications guy: What am I going to make?
It’s time for our weekly pie night. Autumn brings to mind certain tastes-cinnamon, freshly pressed apple ciders, and maple syrup (although made in the spring). I revisited my apple pie recipe and introduced these flavors; nothing astonishing, but you don’t need to reinvent the wheel all the time.
I used Cortland apples from a local farm market. Feel free to use your favorite apple.
You could leave off the top crust and cover the pie with a crisp-crumble topping. 
But don’t forget the vanilla ice cream.

Apple Pie with Cinnamon, Cider, and Maple
For one 9” pie
You will need pie dough for a double crust pie, or a single crust pie with crumb topping

2 ½ pounds apples, peeled, cored, and sliced into ½” thick slices
2/3 cup sugar
½ teaspoon ground cinnamon
¼ cup maple syrup (accept no substitutes!)
1/3 cup apple cider
3 Tablespoons cornstarch
1 egg beaten with 1 teaspoon water


1. Place the sliced apples into a bowl.  Add the sugar, cinnamon, maple syrup and cider; mix to
distribute evenly. Set bowl aside for at least 20 minutes.
2. Roll the pie dough to an 1/8th inch thickness and fit it into the pie pan. Refrigerate until needed.
2. Heat oven to 450 degrees. After the apples have sat for 20 minutes, add the cornstarch and mix until the cornstarch is dissolved.
3. If you haven’t rolled out the top crust, roll it out. Spread the apples evenly into the prepared bottom crust; pour the juices over the apples. Wet the edge of the bottom crust with the egg wash. Place the top crust over the apples, pressing to seal it to the edge of the bottom crust; trim away any excess dough. Seal and crimp the edges of the pie (or cover the pie with your favorite crumble mixture). Make a small steam hole in the center of the top crust. Brush the crust with egg wash and sprinkle sugar over the top.  Place the pie onto baking pan and place the pie into the oven. Bake for 10 minutes. After 10 minutes, reduce the heat to 350 degrees and continue baking for an hour, until the filling is bubbling (Listen!). You can also test to see if the apples are cooked by sliding a toothpick into the steam hole to see how easily it slides through the apples. Remove from oven and let cool.